[DIY] Dry Box 2.0 – The First Version Wasn't the Last | Trockenbox 2.0 – die erste Version war noch nicht die letzte (EN/DE)
Dry Box 2.0 – The First Version Wasn't the Last | Trockenbox 2.0 – die erste Version war noch nicht die letzte
Sometimes you build something, put it into use and think: that's it, finished.
At first, that was exactly how I felt about my filament dry box. It did what it was supposed to do: keep the filament protected from moisture while still allowing me to print directly from the box.
But as so often happens with my 3D-printing projects, everyday use showed me that “finished” does not always mean finished.
The first thing I noticed was the Bambu spool. In my original version it sat too high in the box and rubbed against the lid. It still worked, but I wasn't happy with it. If the filament is going to be fed directly to the printer, the spool should run freely and without unnecessary resistance.
There was also another point that bothered me even more.
The First Version – Before the Rework
Die erste Version – vor der Überarbeitung
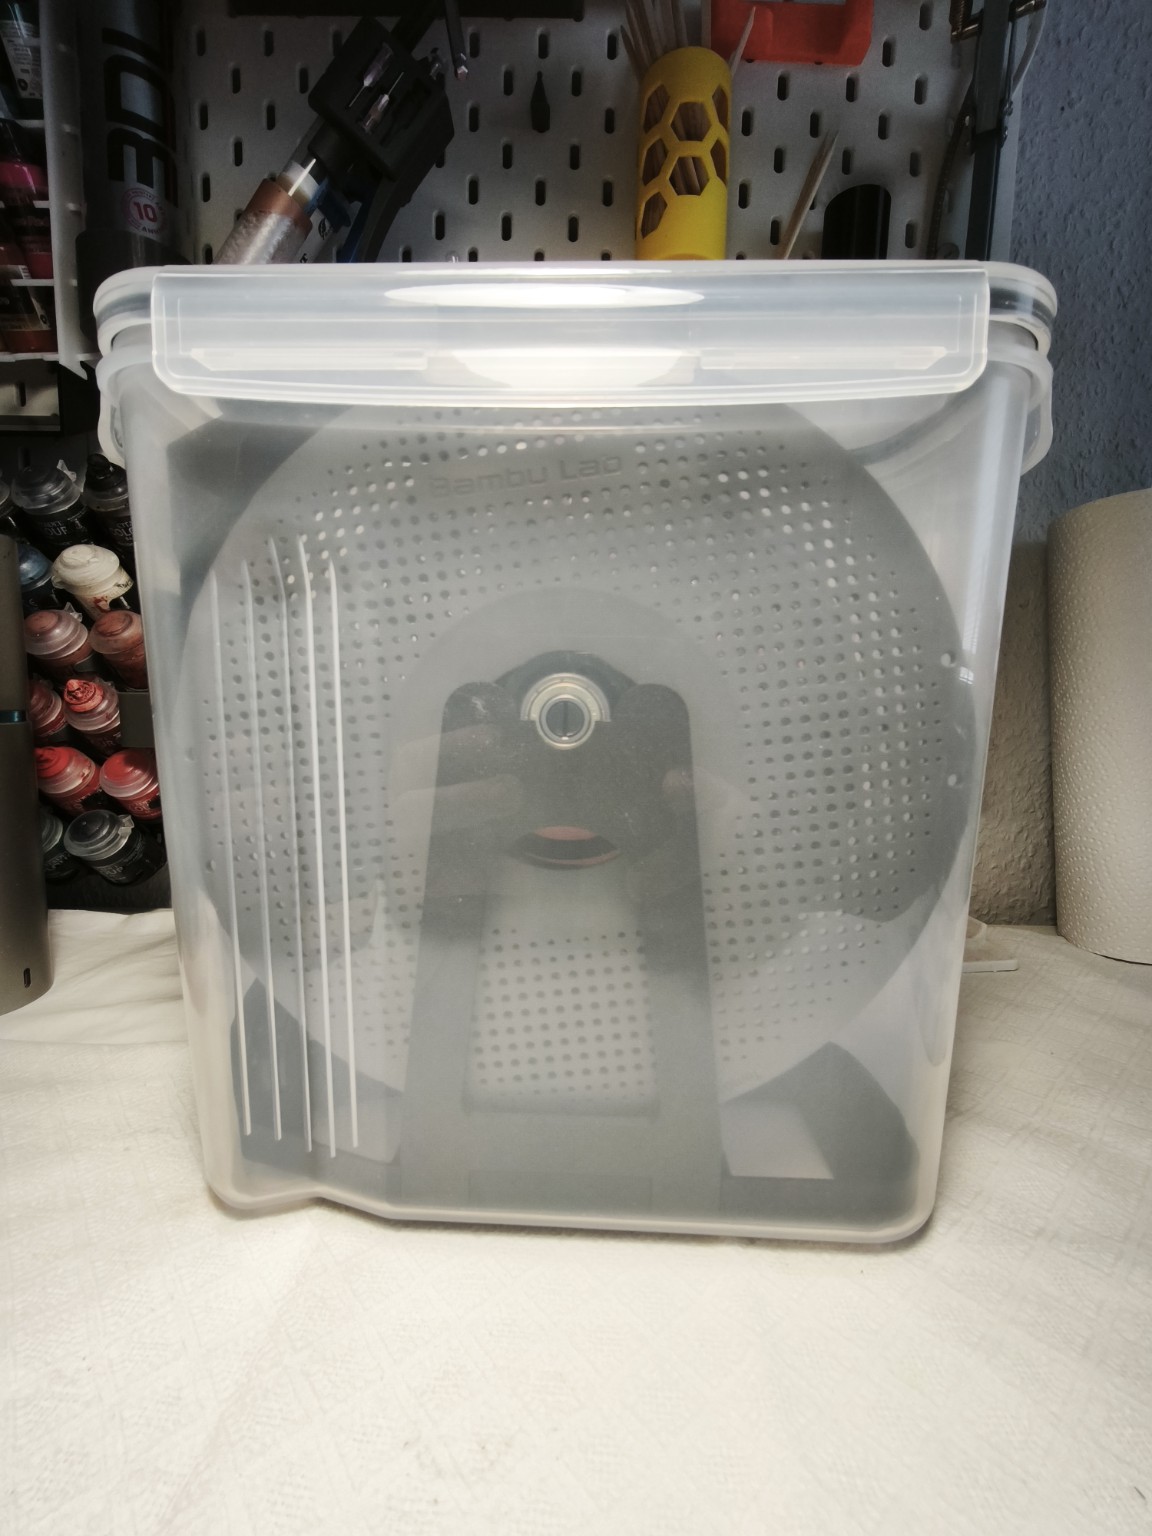
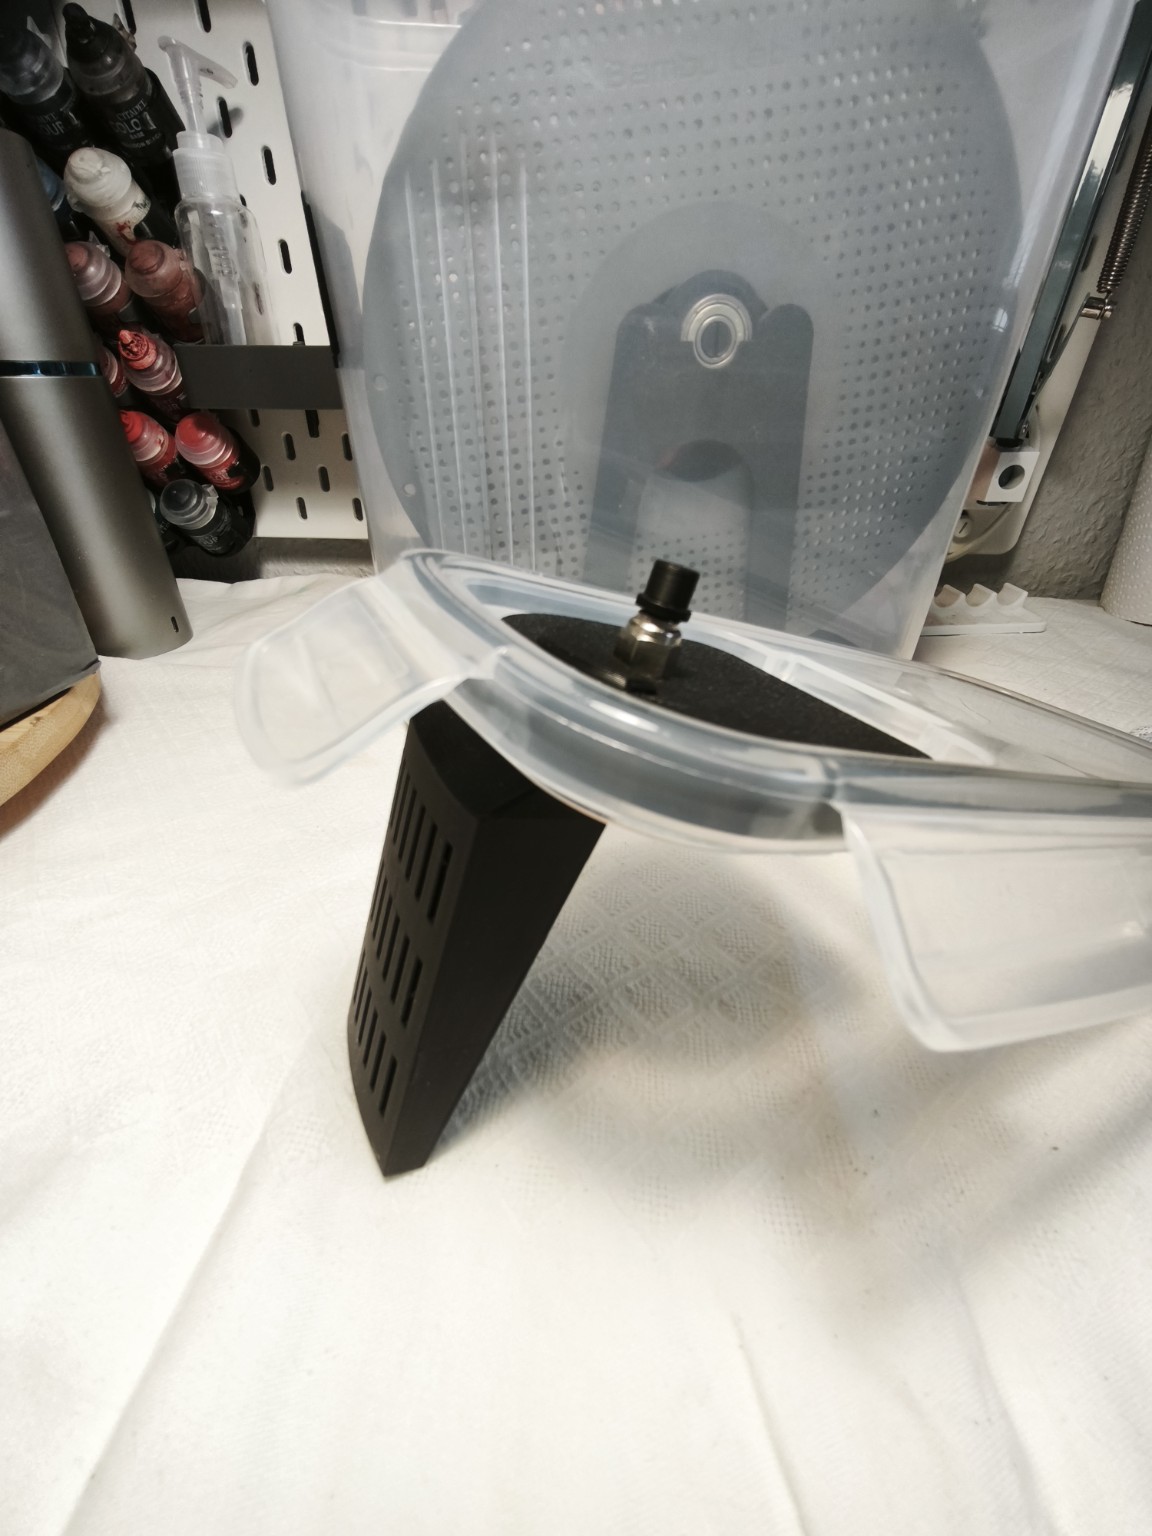
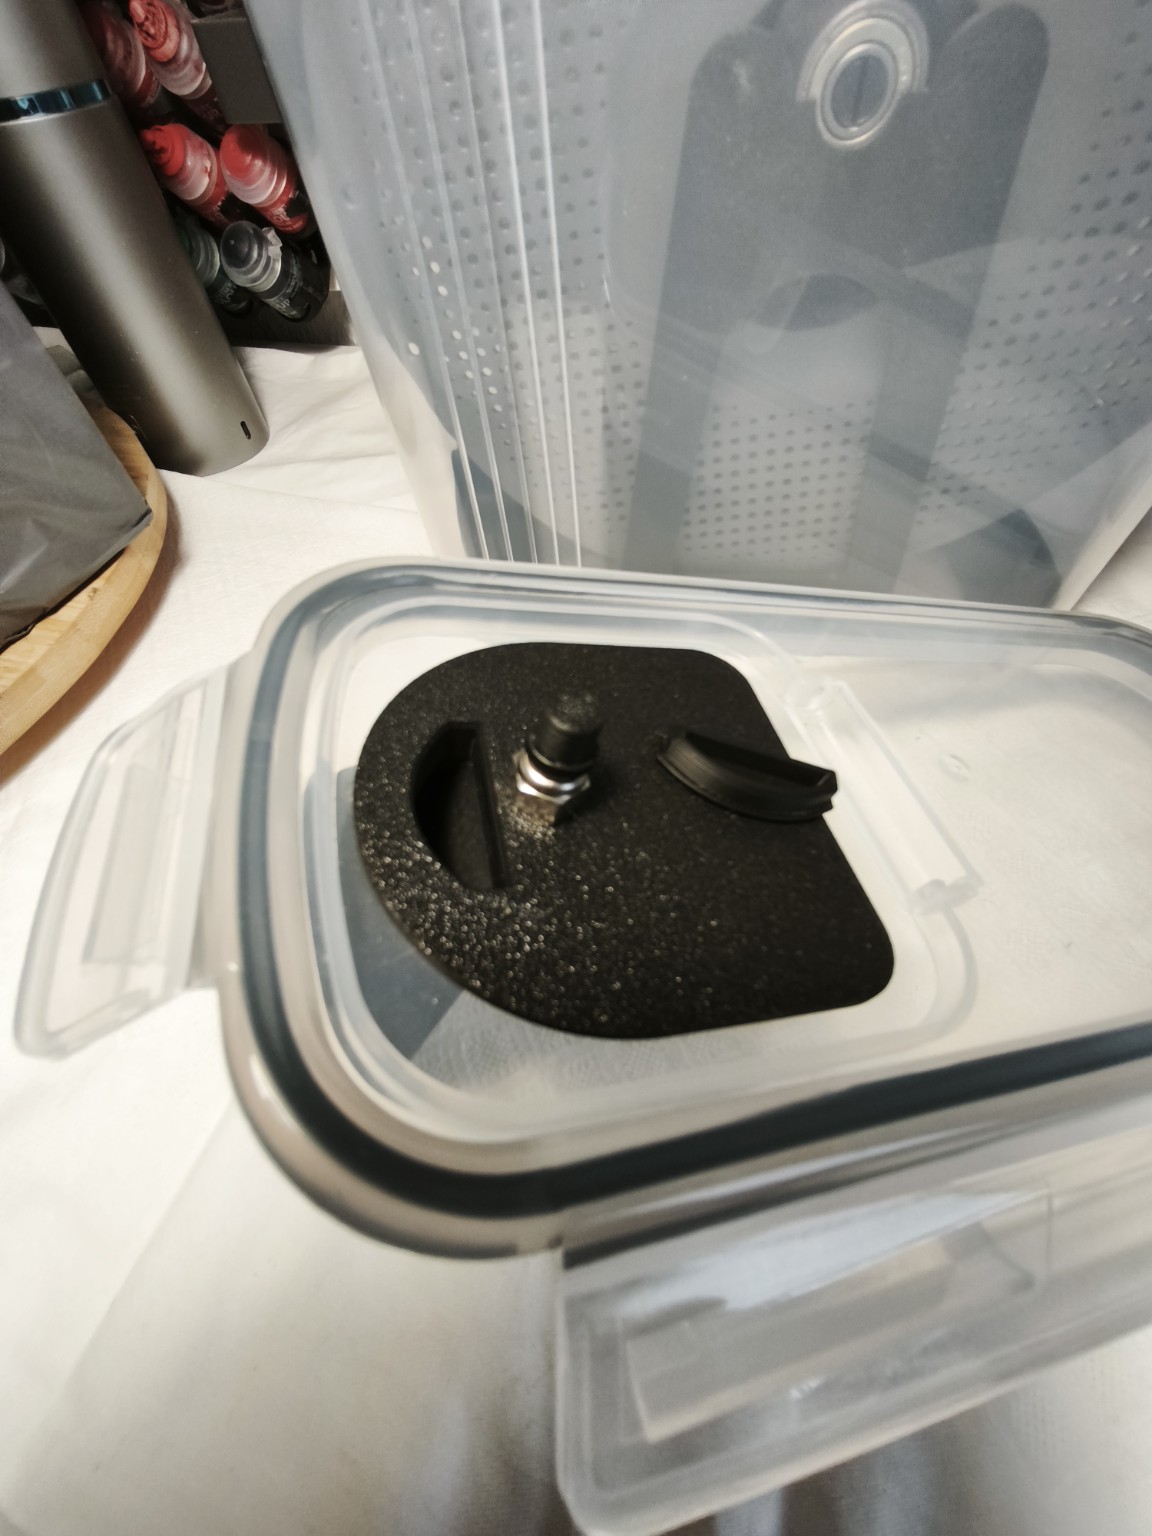
In the first design, the container for the silica gel was located in the lid. It could be refilled through a small separate opening.
That sounded practical when I designed it.
But after using the box for a while, I started to question the idea. I had built a dry box to keep moisture away from the filament – and at the same time I had created an additional opening in the lid through which moisture could potentially get back inside.
That didn't really make sense.
So I went back to the design.
I didn't want to rebuild everything from scratch because the basic idea was still good. The parts that caused the problems simply had to change.
Old vs. New – The Lower Frame
Alt gegen Neu – das untere Gestell
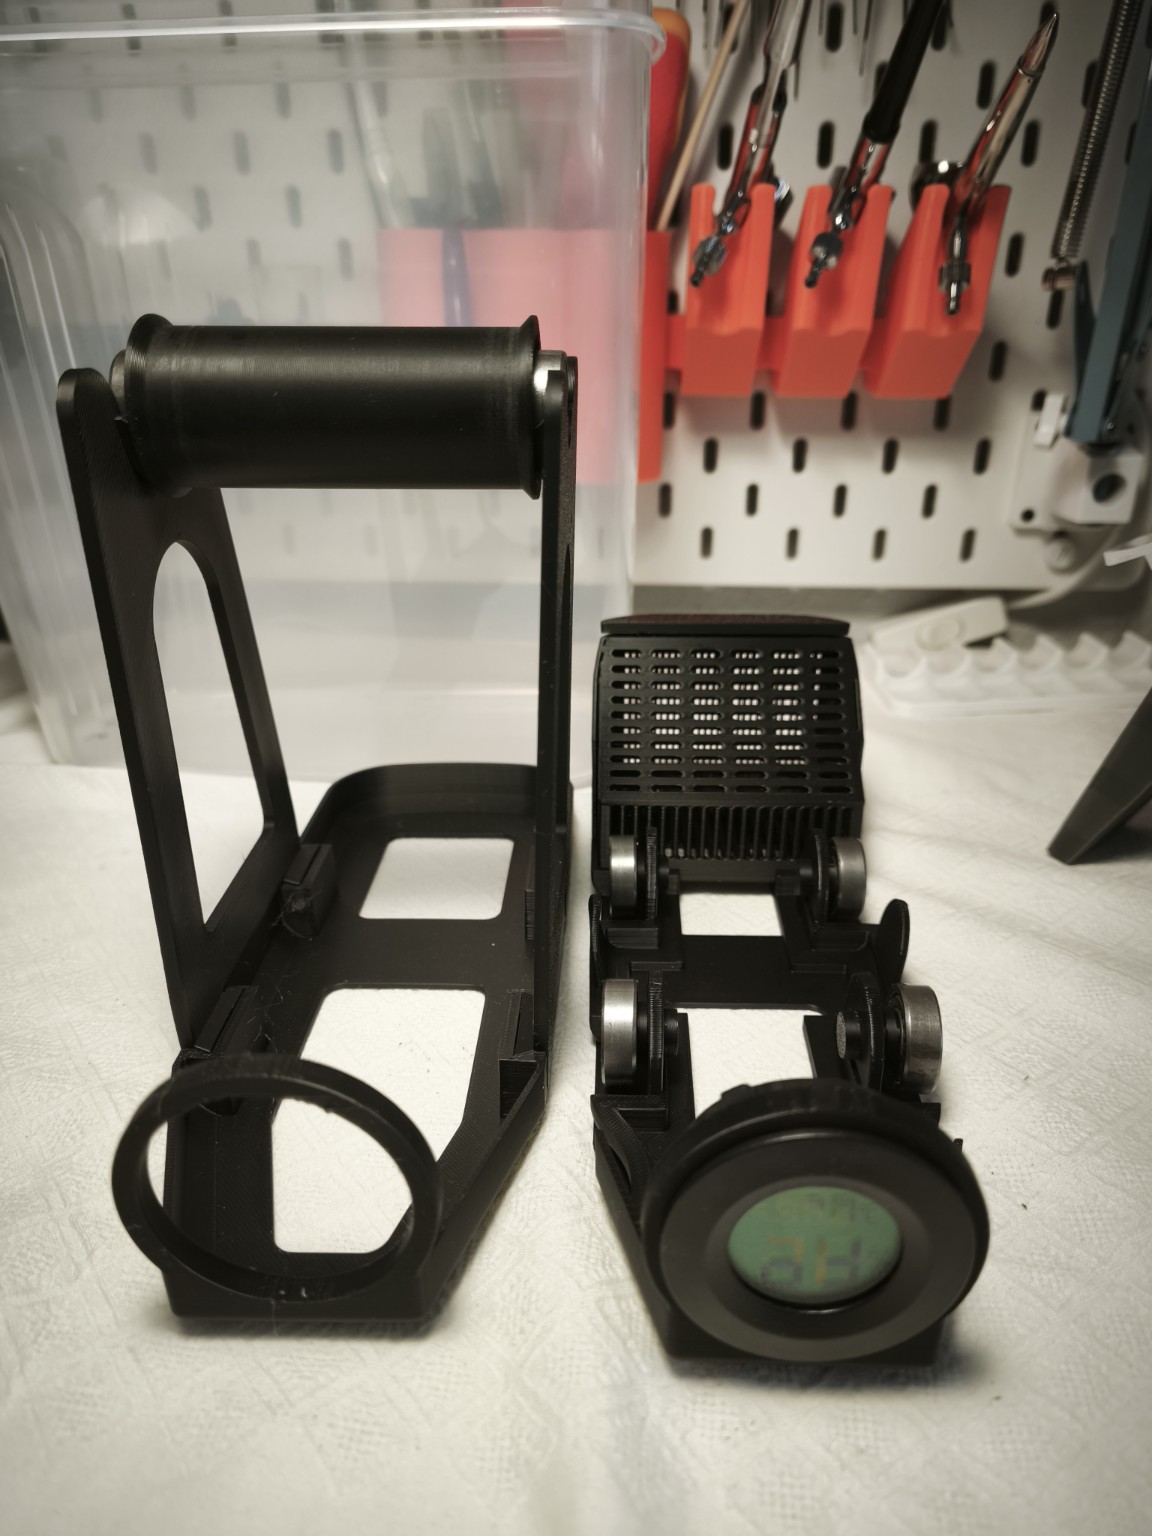
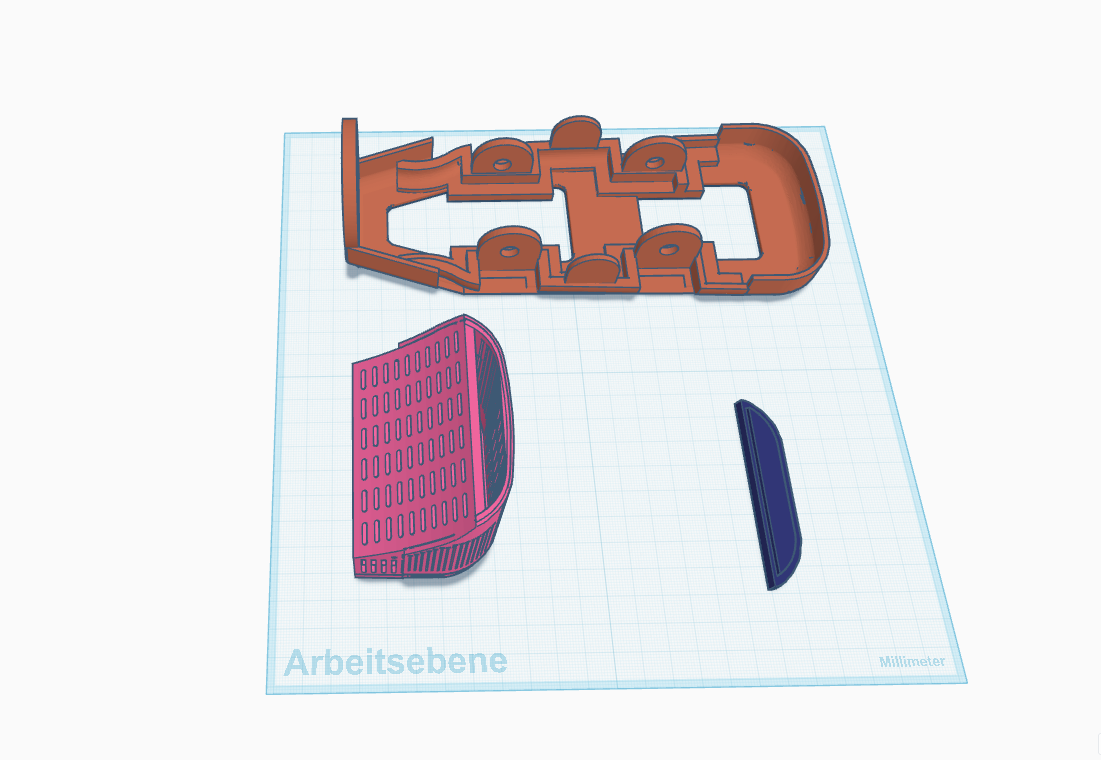
The lower frame was redesigned so that the spool now sits further down in the box. This gives the Bambu spool enough room and it no longer rubs against the lid.
At the same time, I moved the silica container completely away from the lid.
It is now part of the lower frame.
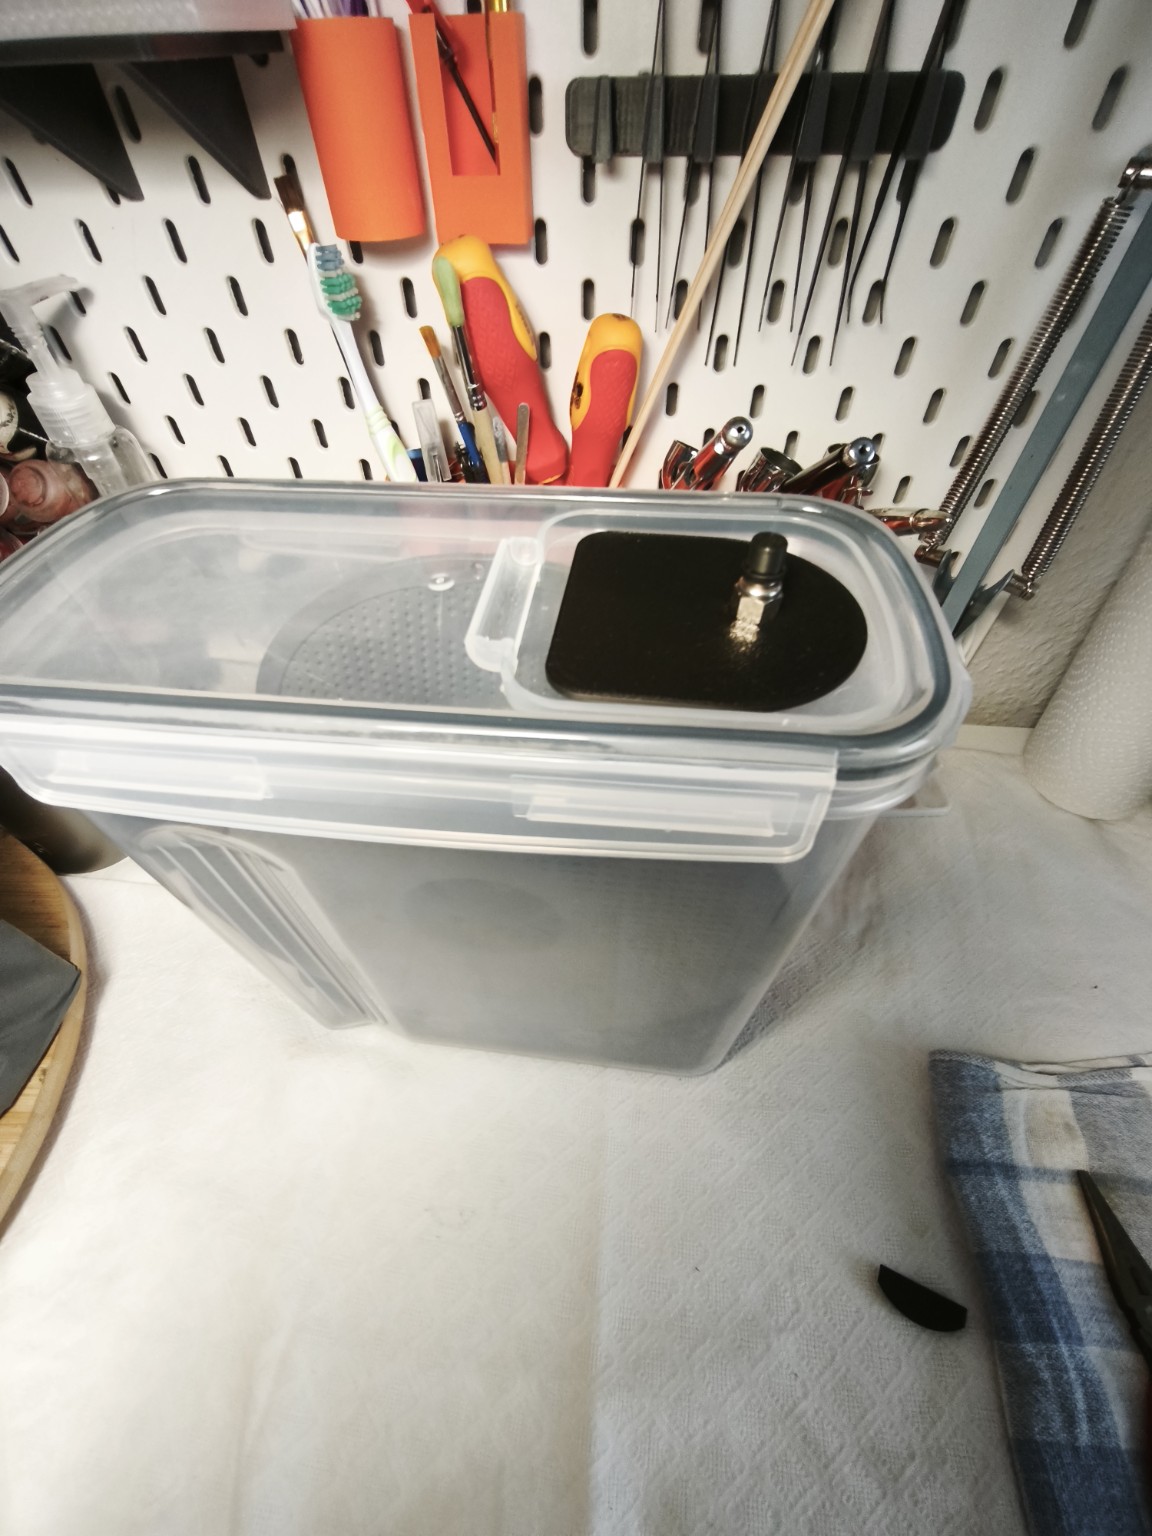
That may look like a small change, but for me it was probably the most important one. The old opening in the lid could finally be closed completely.
No small refill lid anymore and therefore one less possible way for moisture to enter the box.
Of course, I can't seal everything.
The filament still has to get out somehow.
For that, I now guide it through a PTFE tube directly from the dry box towards the printer. The opening that remains is therefore very small, while I can still print directly from the box.
And that was exactly what I wanted from the beginning: not just a box for storing filament, but a dry box that can actually stay in use while printing.
The New Version
Das neue Modell – die überarbeitete Version
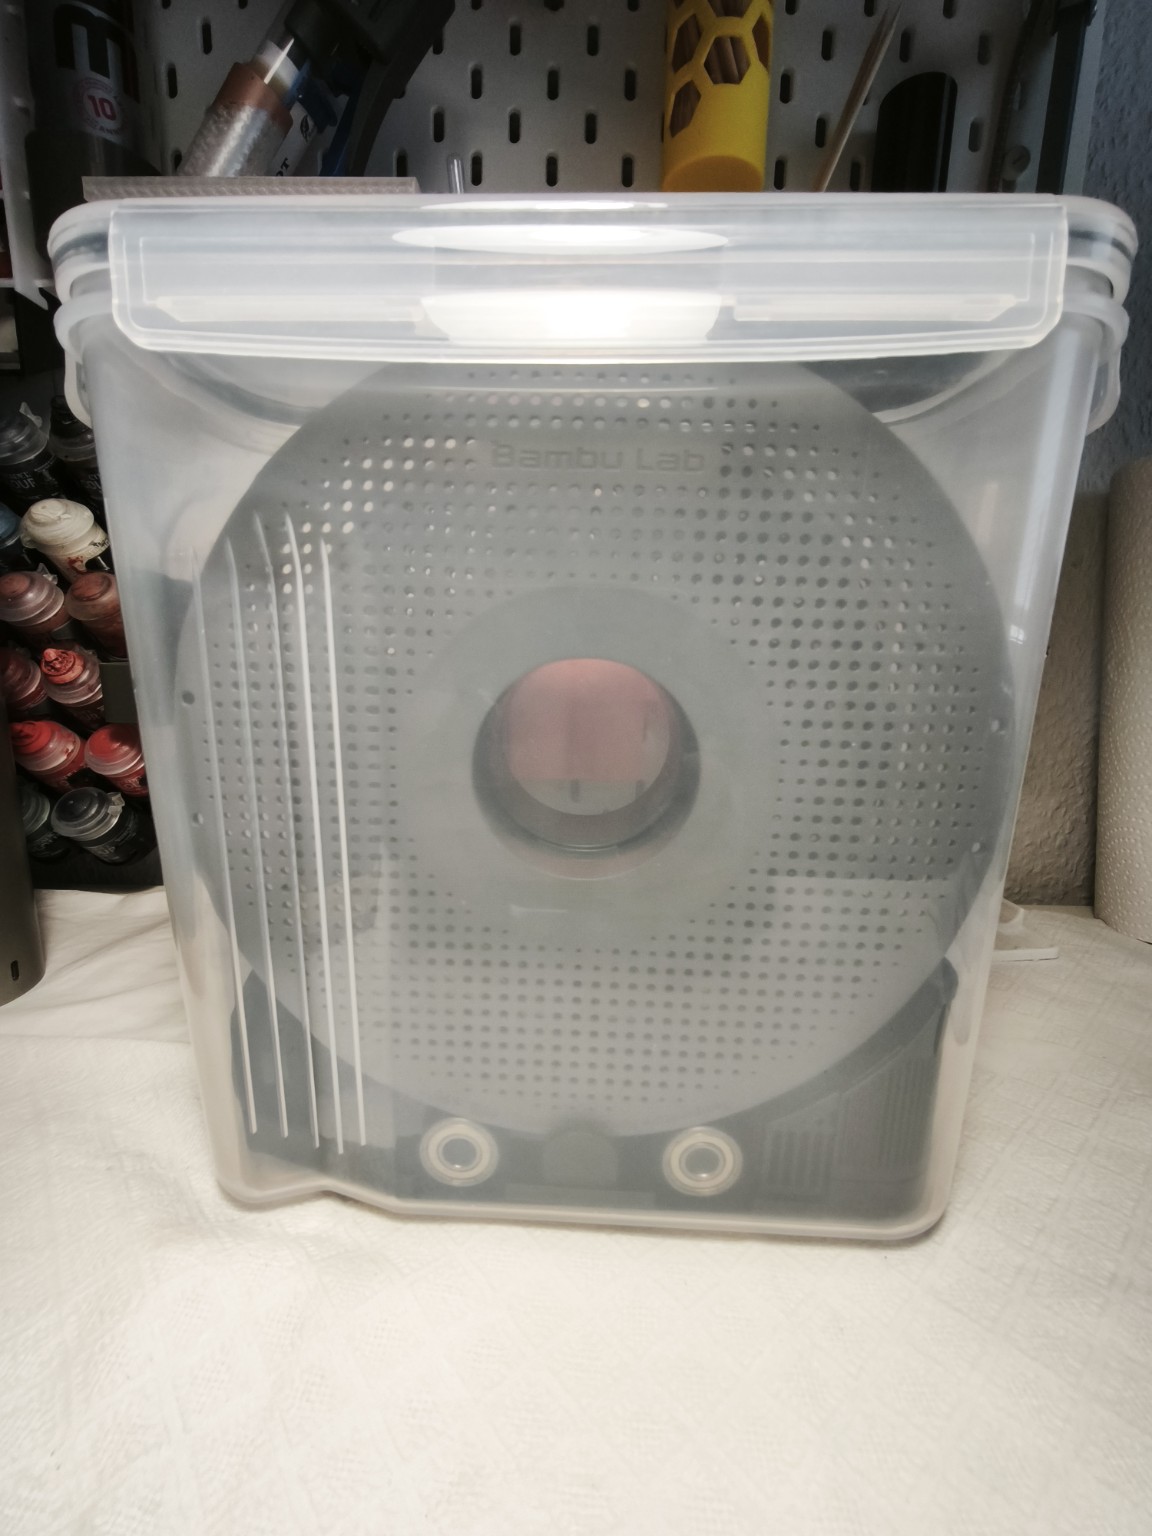
There is another reason why I wanted to get this right.
The dry box is intended to supply the second nozzle of my Bambu Lab X2D.
Especially with my figures, I want to experiment more with PETG as a separation layer between PLA supports and the actual PLA model.
PLA and PETG don't bond particularly well to each other. Normally that might sound like a disadvantage, but in this case it is exactly what I want.
The figure itself can stay PLA. PETG is only used where the support touches the model.
My hope is that the supports will come away more easily and, above all, leave cleaner surfaces behind.
And anyone who prints figures knows why that matters.
Removing supports is one thing. The annoying part often comes afterwards: cutting away small leftovers, sanding the surfaces and repairing spots where the support has left marks.
If I can reduce that work even a little with the second nozzle, it would already be worth it for me.
For that to work properly, I also want the filament to arrive at the printer as dry and smoothly as possible.
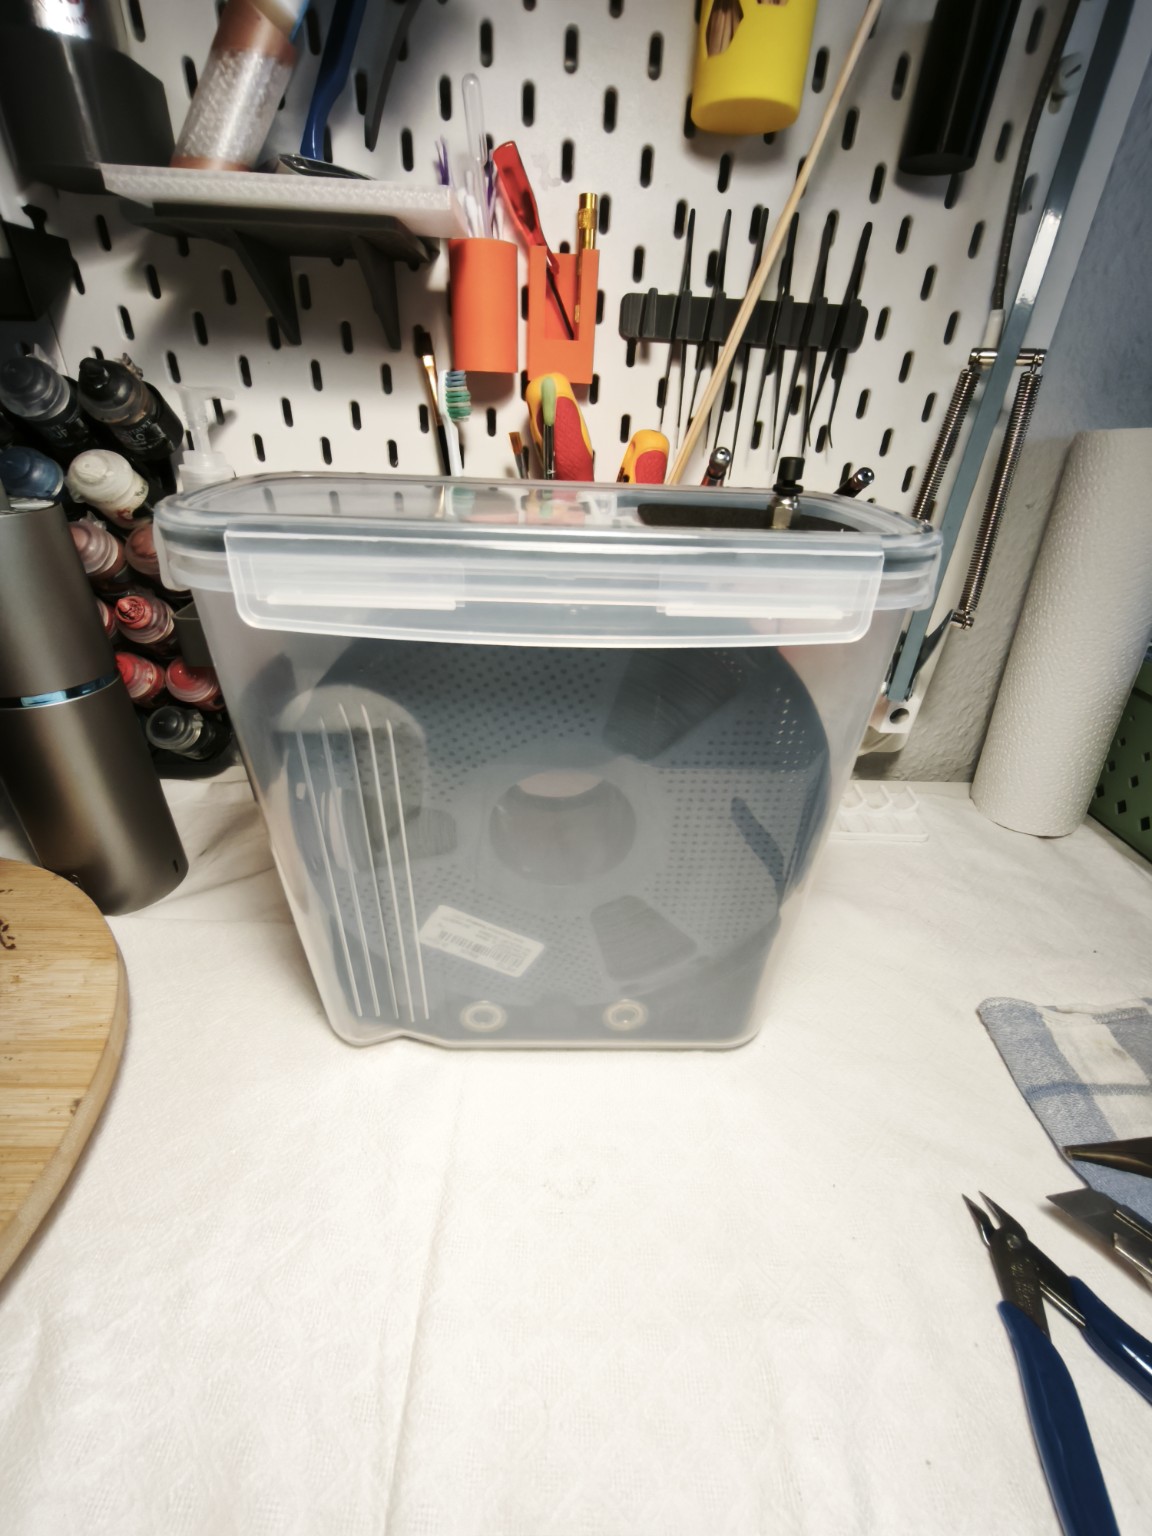
Final Setup – Connected to the Printer
Der endgültige Platz – direkt mit dem Drucker verbunden
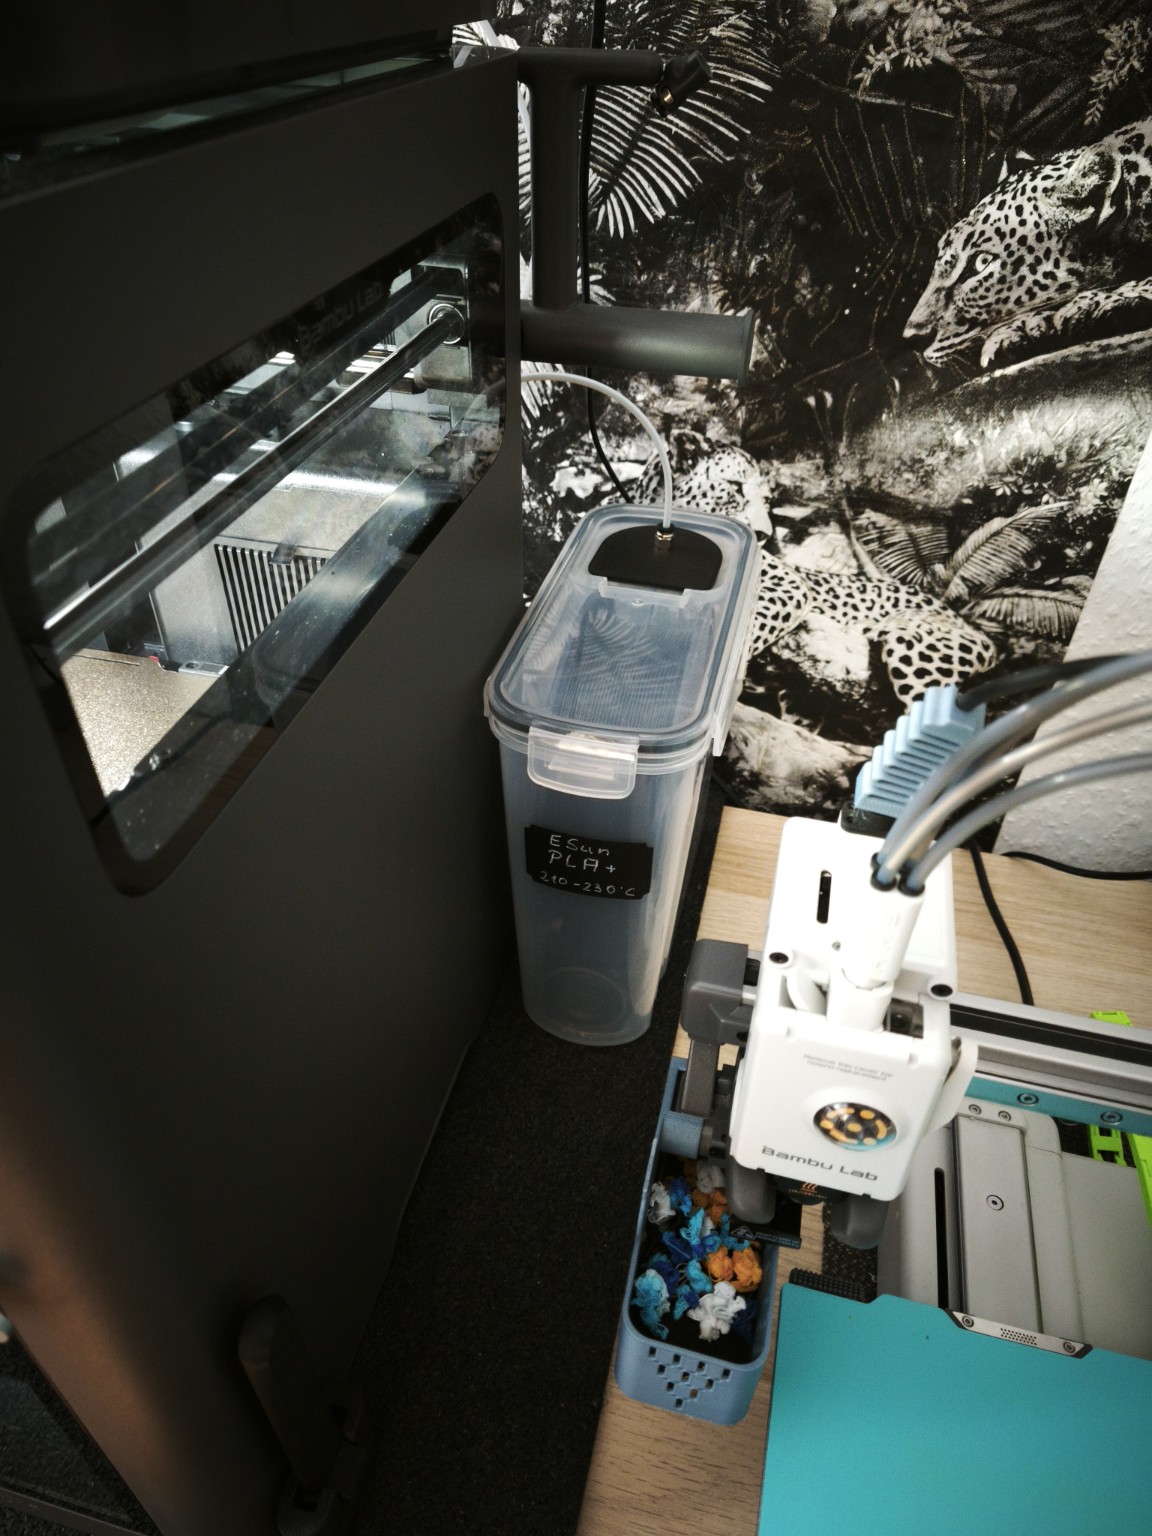
The dry box has now found its final place next to the printer and is connected directly through the PTFE tube.
When I look at the finished version, the changes don't seem particularly dramatic.
But that is often the case.
It wasn't necessary to reinvent the whole dry box. I just had to fix the things that annoyed me in the first version.
The spool now has enough room, the silica gel has moved to a better place, the unnecessary opening in the lid is gone and the filament can still be fed directly to the printer.
For now, I'm much happier with this solution.
Whether using PETG as the separation layer will save me as much work on my figures as I hope will show with the next prints.
But that's also one of the things I like about 3D printing.
You build something, use it, discover what doesn't quite work – and then you change it.
Version 1.0 wasn't a failure.
It simply showed me what Version 2.0 had to do better.
Manchmal baut man etwas, setzt es ein und denkt: Das war's – fertig.
Genau so ging es mir zuerst mit meiner Trockenbox. Das Filament war darin geschützt und gleichzeitig konnte ich direkt aus der Box heraus drucken.
Im Alltag zeigte sich dann aber ziemlich schnell, dass meine erste Version doch noch ein paar Schwachstellen hatte.
Die Bambu-Rolle saß zu hoch und schliff am Deckel. Es funktionierte zwar, aber wenn das Filament direkt zum Drucker laufen soll, möchte ich natürlich, dass sich die Rolle möglichst frei bewegt.
Noch mehr störte mich der Silica-Behälter im Deckel. Über einen kleinen zusätzlichen Deckel konnte ich das Silica bequem nachfüllen. Anfangs fand ich das praktisch – bis ich mir irgendwann die Frage stellte, warum ich eine Trockenbox baue und gleichzeitig eine zusätzliche Öffnung im Deckel lasse.
Also musste ich noch einmal an die Konstruktion.
Das untere Gestell wurde verändert, sodass die Filamentrolle jetzt tiefer sitzt und genügend Abstand zum Deckel hat. Gleichzeitig ist auch der Behälter für das Silica nach unten in dieses Gestell gewandert.
Damit konnte ich die bisherige Öffnung im Deckel komplett schließen.
Ganz dicht kann die Box natürlich trotzdem nicht sein, denn irgendwo muss das Filament zum Drucker gelangen. Dafür nutze ich jetzt einen PTFE-Schlauch. So bleibt nur noch eine sehr kleine Öffnung und ich kann trotzdem weiterhin direkt aus der Box heraus drucken.
Genau das war mir wichtig.
Die Trockenbox soll später die zweite Düse meines Bambu Lab X2D versorgen. Gerade bei meinen Figuren möchte ich ausprobieren, PETG als Trennschicht zwischen PLA-Support und dem eigentlichen PLA-Modell einzusetzen.
PLA und PETG verbinden sich nicht besonders gut miteinander – und genau das soll hier zum Vorteil werden. Wenn sich die Supports dadurch leichter lösen lassen und die Flächen darunter sauberer bleiben, kann mir das einiges an Nacharbeit ersparen.
Weniger schneiden, weniger schleifen und weniger Stellen ausbessern.
Ob das in der Praxis so gut funktioniert, wie ich mir das vorstelle, werden die nächsten Drucke zeigen.
Die Trockenbox hat jetzt jedenfalls ihren endgültigen Platz neben dem X2D gefunden. Die Rolle hat genügend Platz, der Silica-Behälter sitzt unten, die zusätzliche Öffnung im Deckel ist verschwunden und das Filament wird über den PTFE-Schlauch direkt zum Drucker geführt.
Manchmal braucht es eben keine komplett neue Idee.
Man muss nur herausfinden, was an der ersten noch nicht richtig funktioniert.
Version 1.0 war deshalb kein Fehlversuch.
Sie hat mir nur gezeigt, was Version 2.0 besser machen muss.
Have you already tried PETG as a support interface for PLA, or have you built your own dry box? I'm curious to hear how you solved it.
Habt ihr PETG bereits als Trennschicht bei PLA ausprobiert oder selbst eine Trockenbox gebaut? Mich würde interessieren, welche Lösungen ihr dafür gefunden habt.
Hornet on Tour

Instagram: [hornet_on_tour](https://www.instagram.com/hornet_on_tour/)
Photo: Hornet on Tour
Translated with www.DeepL.com/Translator (free version)
Me llamó la atención cómo moviste el contenedor de gel de sílice del tapón al cuerpo; la diferencia se nota en la estanqueidad. Además, bajar el spool Bambu para que no roce la tapa es práctico, eso evita atascos. 🚀