The Iron Vanguard: How To Easily Model An Armored Knight Low Poly Character In Unity
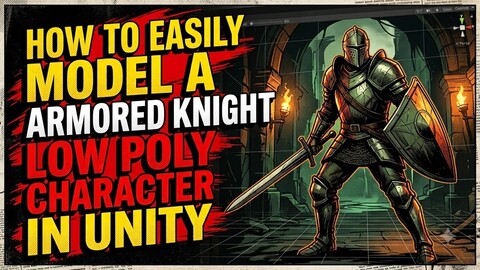
In the modern game development landscape, Unity has evolved far beyond being just a game engine. With the introduction of tools like ProBuilder, PolyBrush, and robust shader graph capabilities, Unity is now a viable environment for rapid prototyping and even final asset creation. While traditional pipelines involve modeling in Blender or Maya and importing into Unity, creating assets directly within the engine offers a unique advantage: immediate visual feedback. You see how the lighting, materials, and scale interact in real-time, eliminating the tedious import-export loop.
The Armored Knight is an ideal subject for this in-engine workflow. This archetype relies on clean, modular geometry, hard-surface details, and metallic reflections. These elements are perfectly suited for Unity’s primitive-based modeling tools and PBR (Physically Based Rendering) material system. This comprehensive guide will walk you through the professional process of modeling a Low-Poly Armored Knight directly within Unity using ProBuilder.
Phase 1: Conceptualization and Environment Setup
Before placing a single cube, we must define the visual language of our knight. "Medieval" can mean many things, so we need to narrow it down to ensure cohesion.
Defining the Archetype
For this guide, we will design a "Heavy Plate Infantryman."
- Silhouette: Broad shoulders, a helmet with a distinct visor, a large shield, and a one-handed sword. The shape should feel grounded, heavy, and immovable.
- Key Elements: A segmented breastplate, pauldrons (shoulder armor), gauntlets, greaves (leg armor), and a simple tunic underneath.
- Color Palette: Steel grey (armor), worn leather brown (straps/gloves), and a faded crimson or blue (tunic/cape). These colors translate well to flat shading and help distinguish materials without complex textures.
Setting Up the Unity Project
- Create a New Project: Select the 3D (Built-in Render Pipeline) or URP (Universal Render Pipeline) template. URP is recommended for better performance and modern shader features.
- Install ProBuilder: Go to
Window > Package Manager. Search for ProBuilder and install it. This is the core tool we will use for modeling. It allows you to create, edit, and texture meshes directly in the Scene view. - Scene Setup: Create a simple plane for the ground. Add a Directional Light and adjust its rotation to create dramatic shadows. Set the background color to a neutral grey to avoid color bleeding into your model.
Phase 2: Block-Out with ProBuilder Primitives
We begin by blocking out the basic forms using ProBuilder’s primitives. This phase is about establishing scale and proportion before adding any detail.
Step 1: The Base Body
- Create a Cube: Go to
GameObject > ProBuilder > Cube. Rename itBody_Torso. - Scale and Position: Scale it to resemble a human torso. For a knight in plate armor, make it slightly broader than a natural human body to accommodate the bulk of the metal.
- Limbs: Create four cylinders (
GameObject > ProBuilder > Cylinder) for the arms and legs. Scale them to be thick and sturdy. Reduce the number of radial segments to 6 or 8 to maintain the low-poly aesthetic.
Step 2: The Helmet and Visor
- Head: Create a sphere or a rounded cube for the helmet. Place it on top of the torso.
- Visor: Create a flat cylinder or a scaled sphere segment. Position it over the face area. This will be our key facial feature.
- Neck Guard: Use a torus or a scaled cylinder to create the connection between the helmet and the suit. This adds mechanical detail and breaks up the silhouette.
Step 3: The Shield and Weapon
- Shield: Create a large rectangle. Use the Offset Tool (in ProBuilder Edit Mode) to create a border for the rim. Push/Pull the rim outward to give it depth.
- Sword: Create a long, tapered triangle for the blade. Extrude it to give it thickness. Add a cross-shaped guard at the base.
Phase 3: Detailed Modeling – The ProBuilder Workflow
Now that the block-out is complete, we refine the shapes using ProBuilder’s editing tools. This is where the character transitions from a collection of primitives to a cohesive suit of armor.
Technique 1: Extruding and Beveling
Select your Body_Torso mesh and enter Edit Mode (click the pencil icon in the ProBuilder toolbar).
- Armor Plates: Select the front faces of the torso. Use the Extrude tool to pull them outward, creating a chest plate.
- Bevel Edges: Select the edges of the chest plate and use the Bevel tool. This creates a small chamfered edge, which catches the light and gives the armor a manufactured look. Keep the bevel small to maintain the low-poly style.
- Segmentation: Use the Loop Cut tool to add horizontal lines across the abdomen. Separate these faces slightly to create segmented armor plates, allowing for flexibility in the suit’s design.
Technique 2: Creating the Limbs and Joints
- Shoulder Pads: Duplicate the shoulder vertices of the torso and extrude them outward to create pauldrons. Round off the corners using the Weld or Merge tools if necessary, or keep them sharp for a militaristic look.
- Knees and Elbows: Add extra geometry at the joints. Extrude small protective plates over the knees and elbows. These "hard points" are classic medieval design elements that suggest durability.
- Boots: Scale the bottom of the leg cylinders outward to create bulky boots. Add treads by extruding small rectangular faces on the sole.
Technique 3: The Cape and Fabric
Fabric is difficult in ProBuilder because it doesn’t have cloth simulation. However, for low-poly, we can stylize it.
- Base Shape: Draw a long, triangular plane hanging from the shoulders.
- Folds: Use the Line tool to draw vertical and diagonal lines across the cloak. Select these lines and use the Move tool to pull them outward or push them inward randomly. This creates sharp, angular folds that mimic fabric movement in a stylized way.
Phase 4: Material Creation with Shaders
Unity’s strength lies in its material system. We will use the Standard Shader (Built-in) or Lit Shader (URP) to create the metallic look without needing external texturing software.
Step 1: The Armor Material (PBR)
- Create a Material: Right-click in the Project window >
Create > Material. Name itMat_Armor_Steel. - Albedo: Set the base color to a dark grey.
- Metallic/Smoothness: Set Metallic to 0.9 and Smoothness to 0.7. This gives the suit a highly reflective, polished steel look.
- Normal Map (Optional): If you have a simple normal map for panel lines, apply it here. Otherwise, rely on geometry for detail.
Step 2: The Leather and Cloth Materials
- Leather: Create
Mat_Leather_Brown. Set Metallic to 0.0 and Smoothness to 0.3. Use a brown albedo color. - Cloth: Create
Mat_Cloth_Crimson. Set Metallic to 0.0 and Smoothness to 0.1. Use a deep red albedo color.
Step 3: Applying Materials
Drag and drop the materials onto the corresponding ProBuilder meshes.
Mat_Armor_Steelon the torso, limbs, helmet, and shield.Mat_Leather_Brownon the gloves, boots, and sword hilt.Mat_Cloth_Crimsonon the cape and tunic.
Phase 5: Optimization and Mesh Combining
Since we built the character using multiple ProBuilder objects, we need to optimize it for performance before exporting or using in-game.
Step 1: Merging Meshes
Select all the parts of the character (excluding the weapon if you want it to be detachable).
- Go to
ProBuilder > Actions > Merge Objects. - This combines all selected meshes into a single mesh. This reduces draw calls, which is crucial for mobile or VR performance.
- Keep Materials Separate: Ensure the "Keep Materials" option is checked. This allows the merged mesh to still use different materials for the armor, leather, and cloth parts.
Step 2: Reducing Polygon Count
- Enter Edit Mode on the merged mesh.
- Look for unnecessary geometry. Are there hidden faces inside the helmet? Delete them.
- Use the Optimize action in ProBuilder to remove duplicate vertices and merge coplanar faces.
Step 3: UV Unwrapping
ProBuilder automatically generates UVs, but they may not be optimal.
- In Edit Mode, select all faces.
- Use the UV Editor window (
Window > ProBuilder > UV Editor). - Unwrap the mesh using the Auto UV feature.
- Adjust the UV islands to ensure that high-visibility areas (face, chest) have more texture space.
Phase 6: Lighting and Presentation
A model is only as good as its presentation. We will set up a simple studio lighting rig to showcase the knight directly in the Unity editor.
Step 1: Three-Point Lighting
- Key Light: A strong Directional Light hitting the character from the front-side.
- Fill Light: A softer Point Light on the opposite side to lift shadows.
- Rim Light: A Spot Light behind the character, aimed at their back. This creates a glowing outline around the helmet and shield, separating the character from the dark background.
Step 2: Post-Processing
- Add a Global Volume to the scene.
- Add a Bloom effect. This will make the metallic highlights pop, enhancing the heroic vibe.
- Adjust the Color Grading to slightly cool down the shadows, reinforcing the cold steel environment.
Step 3: Camera Angles
Position the camera at a slight low angle, looking up at the knight. This makes the character feel heroic and imposing. Use a focal length of 35-50mm for a natural perspective.
Professional Tips for In-Engine Modeling
- Modularity is Key: Build the helmet, shield, and weapon as separate objects initially. This allows you to swap them out later to create different variants of the knight (e.g., an archer variant with a bow, a mage variant with a staff).
- Use Reference Images: Drag reference images directly into the Unity Scene view. Align your ProBuilder primitives to these images to ensure accurate proportions.
- Keep It Simple: Don’t over-model. In low-poly, a single well-placed bevel is worth ten unnecessary polygons. Let the materials and lighting do the heavy lifting.
- Test in Context: Always test your character in the actual game environment. Does the steel armor blend into the stone walls? Does the crimson cape get lost in the blood effects? Adjust materials accordingly.
Conclusion
Modeling an Armored Knight in Unity demonstrates the power of modern game engines as all-in-one content creation tools. By leveraging ProBuilder for rapid geometric construction and Standard/URP Shaders for realistic materials, you can bypass the traditional bottleneck of external modeling software.
This workflow is not just about speed; it’s about iteration. You can tweak the shape of the helmet, adjust the reflectivity of the steel, and change the lighting in real-time, ensuring that the final asset is perfectly tuned for your specific project needs. Your knight is no longer just a collection of meshes; he is a beacon of strength in the void, ready to step into your game world. With these techniques, you have unlocked a faster, more intuitive way to bring your medieval visions to life.
(Note: Ye article pure Markdown format mein likha gaya hai. Aap isko directly copy karke Steemit, Medium, ya kisi bhi Markdown support karne wale platform par paste kar sakte hain. Headings, bold text, aur bullet points sab perfectly render honge!)