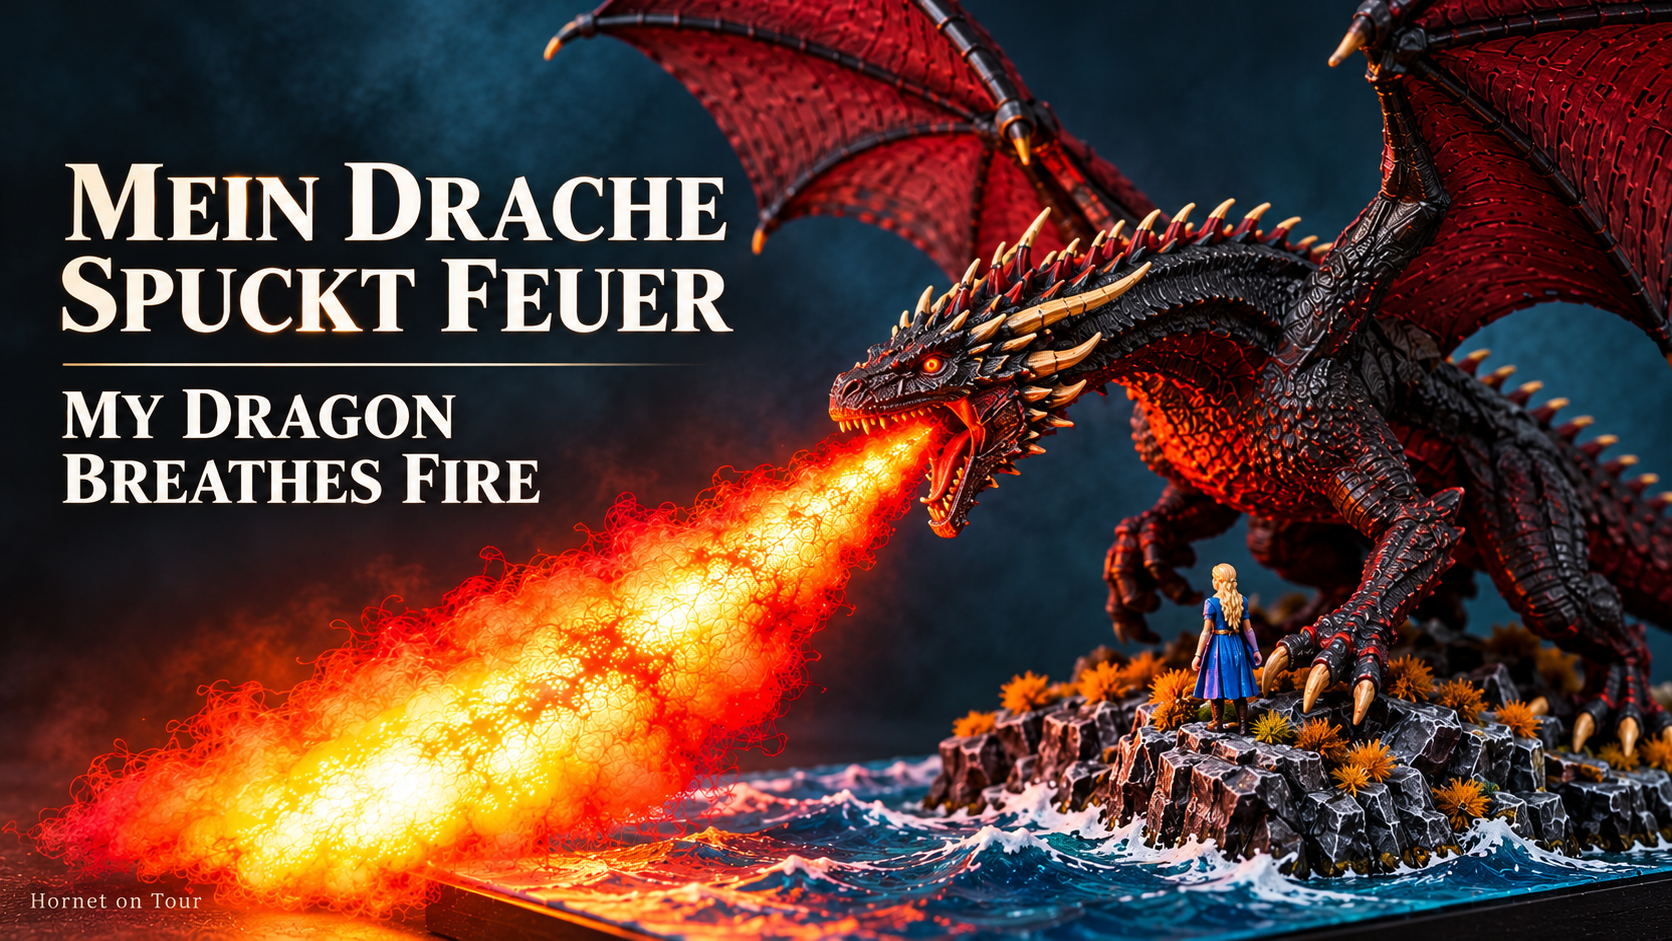
Mein Drache kann jetzt Feuer spucken | My Dragon Can Finally Breathe Fire
Mein Drache kann jetzt Feuer spucken | My Dragon Can Finally Breathe Fire
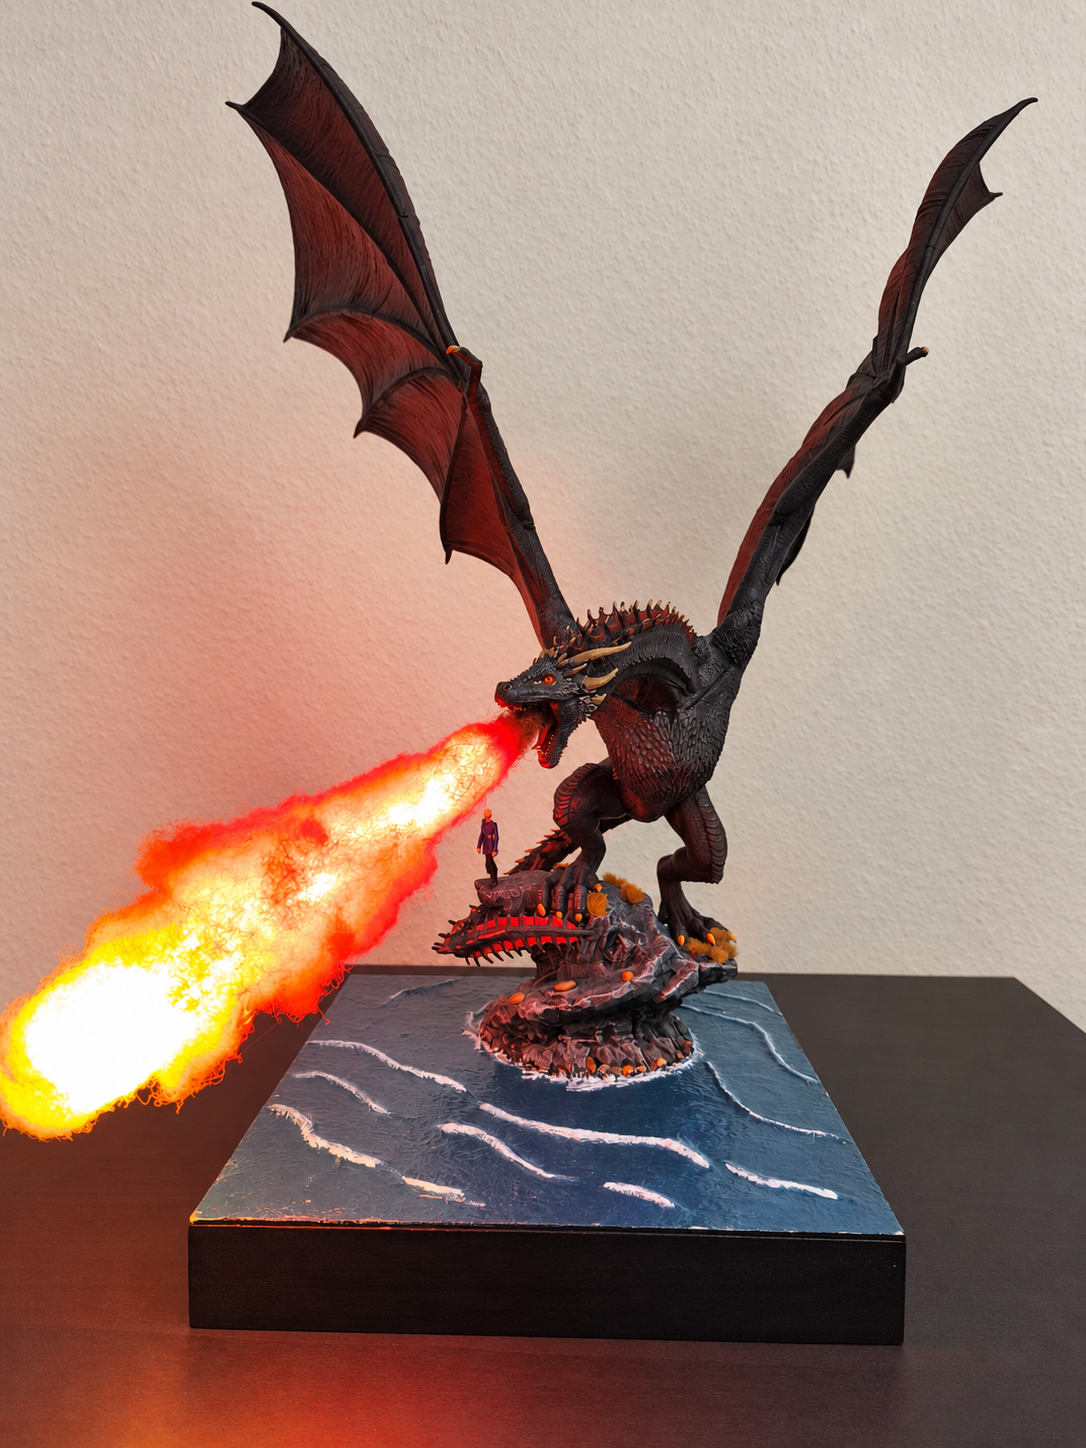
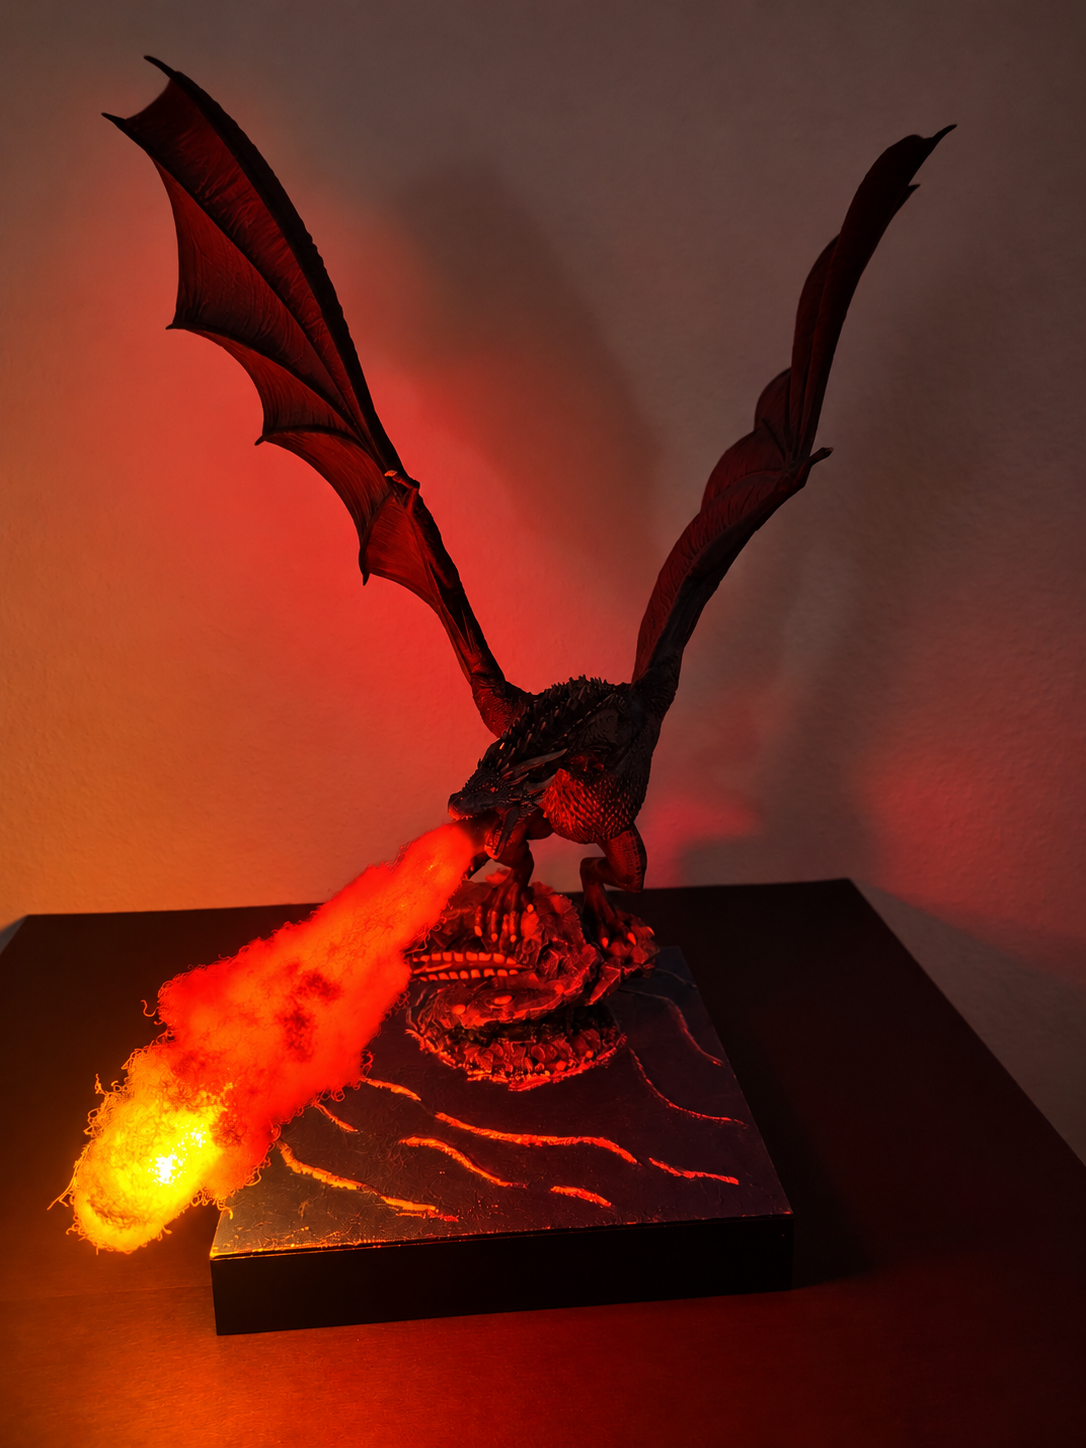
Am Ende habe ich erst einmal das Zimmerlicht gedimmt und den Schalter an der Grundplatte betätigt. Nach all den Abenden mit Druckteilen, Pinseln und Kabeln wollte ich sehen, wie das fertige Diorama im Dunkeln wirkt. Der Feuerstrahl leuchtete auf, sein Licht fiel auf die Felsen und spiegelte sich auf den Wellen. Da war für mich klar: Die zusätzliche Bastelarbeit hat sich gelohnt.
Drogon und Daenerys sind fertig. Mit 54 Zentimetern Höhe ist das Ganze ziemlich stattlich geworden. Auf meinem Basteltisch sah ich lange Zeit immer nur einzelne Abschnitte. Erst beim Zusammenbauen wurde mir wieder richtig bewusst, wie groß die ausgebreiteten Flügel tatsächlich sind.
Ein Druck ist erst der Anfang
Das Modell „Dany and Drogon“ stammt von VS3d / Vengeance Studios 3D. Aus dieser Vorlage habe ich mein eigenes Diorama aufgebaut, die Teile gedruckt, zusammengefügt und bemalt. Die Meeresfläche und die Beleuchtung kamen als eigene Gestaltung dazu.
Die Flügel habe ich zum Bemalen zunächst separat gelassen. Das machte die Arbeit deutlich angenehmer, denn so konnte ich beide Seiten erreichen, ohne ständig den ganzen Drachen bewegen zu müssen. Trotzdem gab es genug Stellen, an denen ich noch einmal nacharbeiten musste. Eine große Figur verzeiht zwar etwas mehr als eine winzige Miniatur, dafür gibt es auch entsprechend viel Fläche.
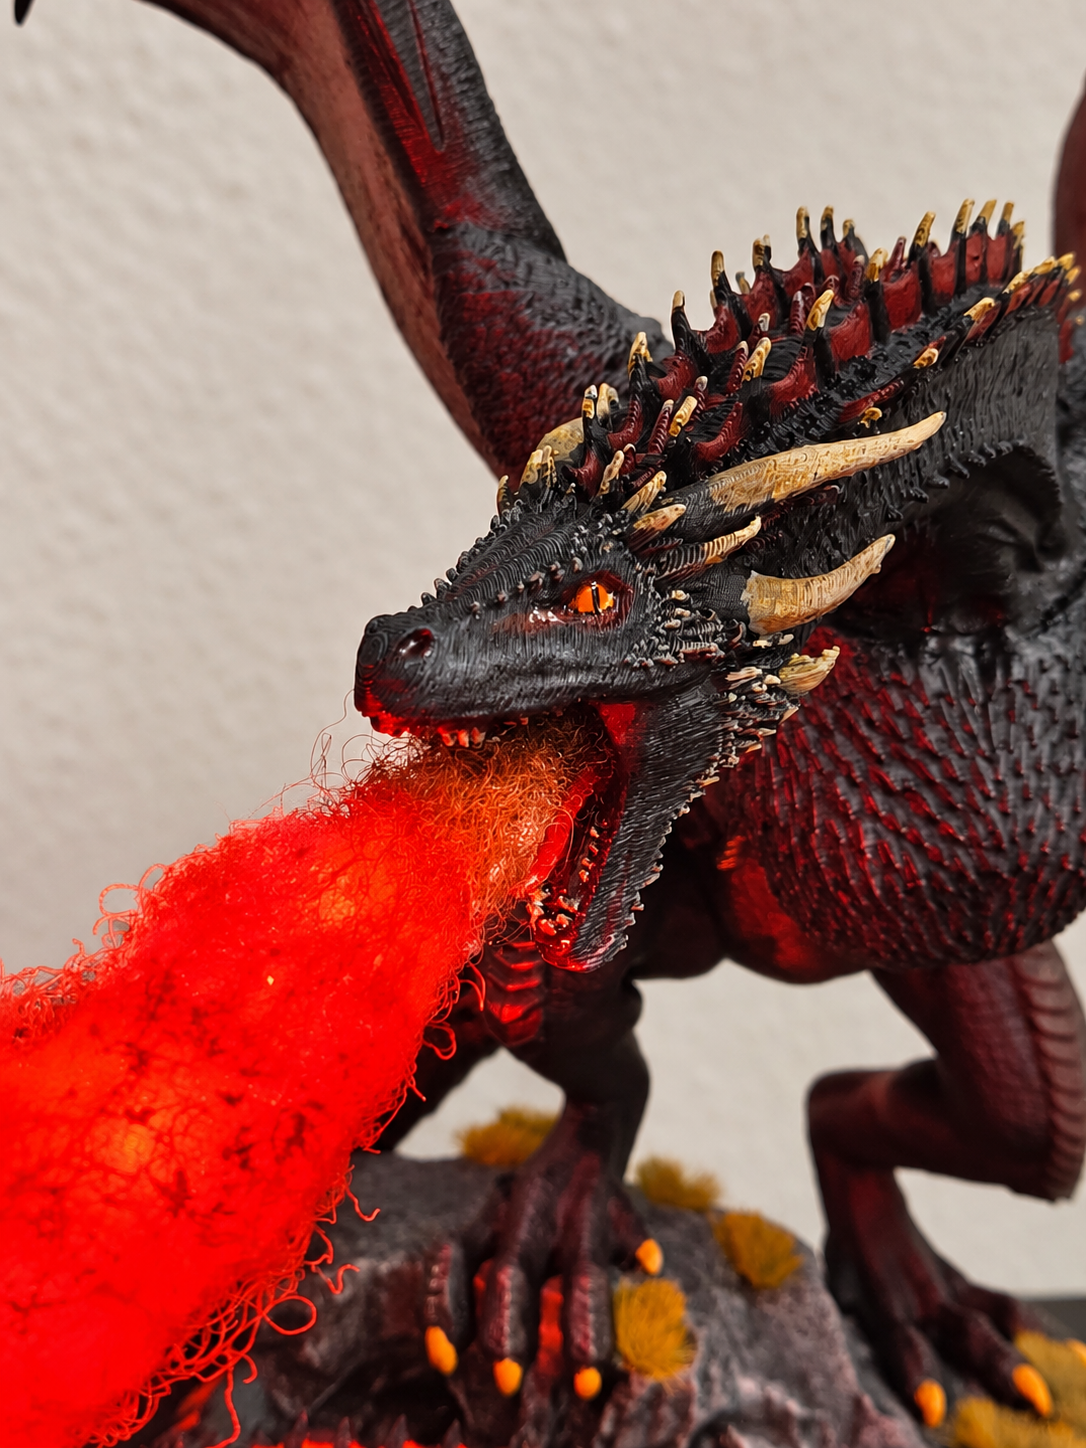
Bei den Schuppen wollte ich die dunkle Wirkung erhalten und gleichzeitig die Struktur sichtbar machen. Dazu kamen die roten Bereiche, die hellen Hörner und die Spitzen entlang des Rückens. Mit jeder weiteren Farbe wurde aus dem Druckstück langsam ein Drache. Augen, Maul und Füße habe ich später noch einmal überarbeitet. Etwas Resin sorgt an den Augen und im Maul für den passenden Glanz.
Der Feuerstrahl war ein eigenes Projekt
Für das Feuer habe ich einen Holzstab, Watte und LED-Filamente in zwei Farben verwendet. Die Form entstand nach und nach. Am Maul beginnt der Strahl schmal, weiter vorne wird er breiter und unregelmäßiger. Die Watte habe ich mit Haarlack fixiert und anschließend eingefärbt.
Dabei habe ich immer wieder zwischen eingeschalteter und ausgeschalteter Beleuchtung gewechselt. Die Farbe auf der Watte beeinflusst schließlich auch das Licht, das noch hindurchkommt. Deshalb ging es in kleinen Schritten voran. Ein wenig Farbe auftragen, trocknen lassen, einschalten und schauen, wie es wirkt.
Besonders gefällt mir, dass die Beleuchtung auch den Rest des Dioramas verändert. An den dunklen Schuppen tauchen rote Reflexe auf, die Steine bekommen einen warmen Schein und die weißen Wellenkämme fangen das Licht ein. Das lässt sich auf Fotos gar nicht so leicht festhalten.
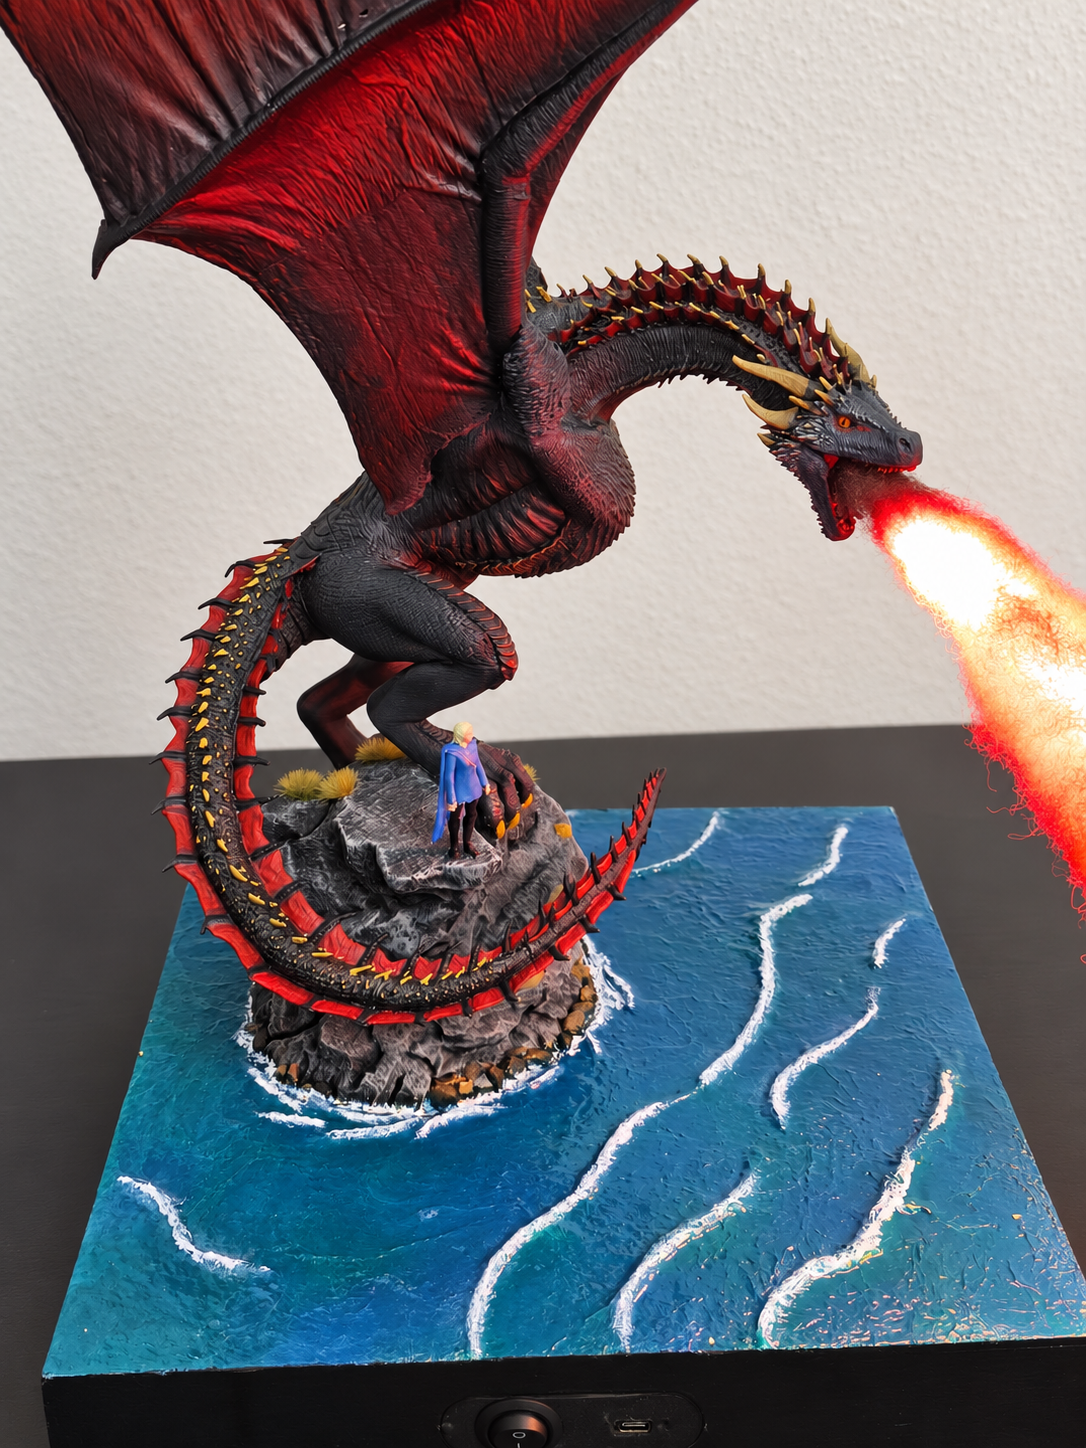
In der Grundplatte sitzen 18650-Akkus, die per USB aufgeladen werden. Der Schalter ist ebenfalls dort untergebracht. Zum Präsentieren brauche ich dadurch keine externe Stromversorgung. Nach den zeitweise frei herumhängenden Kabeln war es schön, auch diesen Teil ordentlich fertigzustellen.
Aus Küchenfolie wird Wasser
Die Grundlage für das Meer ist Alufolie. Zuerst habe ich einzelne Wellen geformt und auf der Platte befestigt. Darüber kam eine größere Lage zerknitterte Folie, die sich über die Erhebungen legt und zusätzliche feine Strukturen mitbringt. Der Platz für die Felseninsel blieb ausgespart.
Nach der Grundierung begann die Bemalung mit Grün. Darüber kamen blaue Lasuren mit Glaze Medium. So blieben unterschiedliche Farbtöne sichtbar, bevor ich die Wellenkämme und Schaumkronen mit Weiß ergänzte. Rund um die Insel kamen kleine Steine und weitere Schaumstellen dazu, damit der Übergang zum Wasser zusammenpasst.
Gerade dieser Teil hat mir gezeigt, wie viel sich mit einfachen Materialien machen lässt. Am Anfang liegt da glänzende Folie auf einer Platte. Einige Arbeitsschritte später steht der Drache auf einer Insel im Meer.
43 Millimeter Geduldsarbeit
Daenerys war zum Schluss noch eine besondere Aufgabe. Sie ist nur 43 Millimeter groß. Neben dem Drachen fällt das kaum auf, beim Bemalen allerdings schon. Nach den großen Flügeln plötzlich an dieser kleinen Figur zu arbeiten, verlangte etwas Umgewöhnung.
Ich habe mich auf die erkennbaren Merkmale konzentriert: helle Haare, helle Haut, blaue Kleidung und dunkle Stiefel. Dazu kam die kleine goldene Kette. Für feinste Gesichtsdetails sind meine Fähigkeiten bei dieser Größe begrenzt, und das ist für mich auch in Ordnung. Auf ihrem Platz im Diorama erfüllt sie genau ihren Zweck und macht Drogons Größe erst richtig deutlich.
Jetzt ist das Projekt abgeschlossen. Natürlich kenne ich die Stellen, an denen ich länger gesessen habe oder etwas ändern musste. Aber wenn ich davorstehe, sehe ich vor allem das fertige Ganze. Es stecken viele Stunden meiner Freizeit darin, und ich freue mich, dass aus den Einzelteilen diese Szene geworden ist.
Und wenn es abends etwas dunkler wird, darf Drogon wieder Feuer spucken.
Originalmodell: Dany and Drogon von VS3d / Vengeance Studios 3D
Druck, Bemalung, Meeresgestaltung und LED-Effekt: von mir.
My Dragon Can Finally Breathe Fire
When everything was finished, I dimmed the room lights and pressed the switch on the base. After all those evenings spent with printed parts, brushes and wires, I wanted to see the completed diorama in the dark. The fire lit up, casting a glow across the rocks and catching the crests of the waves. That was when I knew the extra work had been worth it.
Drogon and Daenerys are finished. At 54 centimetres tall, the diorama has become quite a substantial piece. For a long time, I had been looking at separate sections on my workbench. Only during assembly did I fully appreciate the size of those spread wings again.
Printing Is Just the Beginning
The model is “Dany and Drogon” by VS3d / Vengeance Studios 3D. I used their design to build my diorama, printing, assembling and painting the parts myself. The sea and lighting were my own additions.
I kept the wings separate while painting them. That made the work much easier, as I could reach both sides without moving the entire dragon around. There were still plenty of areas that needed another pass. A large model gives you a little more room to work than a tiny miniature, but it also gives you a lot more surface to cover.
For the scales, I wanted to retain the dark appearance while making the texture visible. Then came the red areas, light horns and spikes along the back. With each colour, the printed object began to look more like a dragon. I later revisited the eyes, mouth and feet, adding resin to give the eyes and mouth a shine.
The Fire Became a Project of Its Own
The fire effect uses a wooden rod, cotton wool and LED filaments in two colours. I developed the shape gradually, starting narrow at the mouth and making it wider and more uneven towards the end. Hairspray helped hold the cotton in place before I added colour.
Throughout the process, I kept checking it with the LEDs both on and off. Paint on the cotton affects how much light can pass through it, so I worked in small stages. Add some colour, let it dry, switch it on and see how it looks.
What I particularly enjoy is how the lighting changes the rest of the scene. Red reflections appear on the dark scales, the stones take on a warm glow and the white wave crests catch the light. Capturing that effect in a photograph is harder than I expected.
The base contains 18650 rechargeable batteries that charge through USB, along with the power switch. There is no need for an external power supply while it is on display. After having loose wires hanging around during construction, finishing that part neatly was satisfying too.
Turning Kitchen Foil into Water
Aluminium foil forms the foundation of the sea. First, I shaped individual waves and attached them to the base. A larger crumpled sheet went over them, following the raised shapes and providing the smaller surface textures. I left the space for the rocky island clear.
After priming, I started with green paint and added blue glazes mixed with glaze medium. This allowed different tones to remain visible before I picked out the waves and foam with white. Small stones and extra patches of foam around the island helped connect the shore to the water.
That part showed me how much can be achieved with simple materials. It starts with shiny foil on a board. Several stages later, the dragon is standing on an island surrounded by sea.
43 Millimetres of Patience
Daenerys provided one final challenge. She is only 43 millimetres tall. That is easy to overlook beside the dragon, but you certainly notice it while painting. Moving from the large wings to such a small figure took some adjustment.
I focused on the recognisable features: pale hair and skin, blue clothing and dark boots, plus the small gold chain. Fine facial details at this size are beyond what I can comfortably paint, and I am happy to accept that. In her place on the diorama, she does exactly what I wanted and provides a sense of Drogon’s enormous size.
Now the project is complete. Of course, I know which areas took longer or needed correcting. But when I stand in front of it, I mostly see the finished scene. Many hours of my spare time went into it, and I am pleased that all those separate parts have become something I can put on display.
And when the room gets a little darker in the evening, Drogon gets to breathe fire again.
Original model: Dany and Drogon by VS3d / Vengeance Studios 3D
Printing, painting, sea scenery and LED effect: My own work.
Hornet on Tour

Instagram: hornet_on_tour
Photo: Hornet on Tour
Translated with www.DeepL.com/Translator (free version)
Das selbst gebaute Diorama mit den integrierten LEDs und der Alufolien-Wasserstruktur ist handwerklich wirklich beeindruckend geworden.