How To Easily Model A Noble Gladiator Low Poly Character In Substance
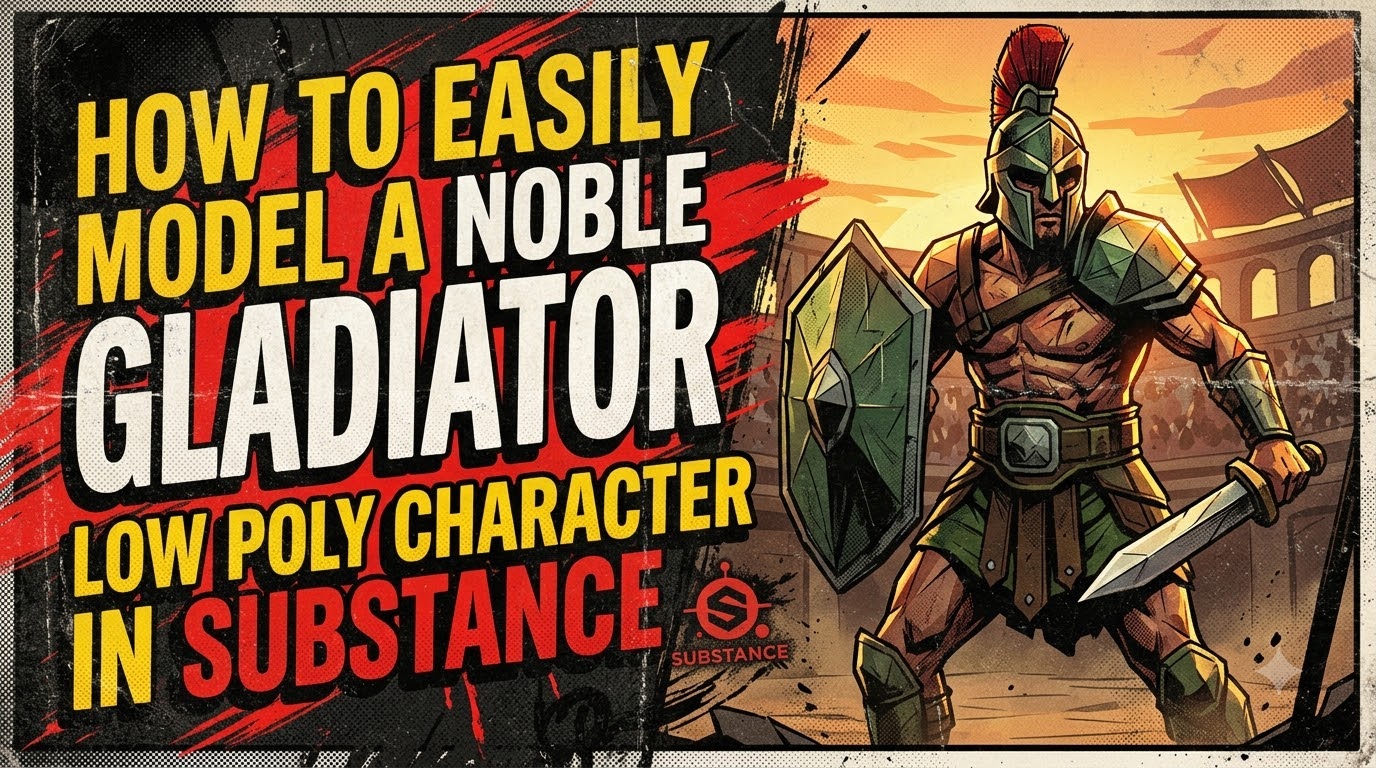
The Golden Champion: A Comprehensive Guide to Modeling a Noble Gladiator in Substance 3D Modeler
In the expansive universe of stylized 3D character design, few archetypes command as much respect and visual intrigue as the Noble Gladiator. This character represents a fascinating intersection of martial prowess and aristocratic elegance. Unlike the gritty, survivalist gladiator who fights for freedom in the dust and blood of the arena, the Noble Gladiator fights for honor, glory, divine favor, or the entertainment of the elite. This distinction is crucial because it dictates the entire visual language of the asset: clean lines, polished metals, intricate engravings, symmetrical proportions, and a posture of unshakeable confidence rather than desperate survival.
Modeling this character in a Low Poly style presents a unique and compelling challenge. How do you convey "nobility," "intricate detail," and "expensive craftsmanship" when you are restricted to a minimal polygon count? In high-fidelity modeling, nobility is communicated through micro-details—fine embroidery, complex filigree, and realistic wear patterns. In low poly, these details must be implied through smart geometry, strategic use of normal maps, masterful texturing, and an unwavering commitment to strong shape language.
While many artists traditionally rely on a pipeline involving Blender or Maya for modeling and then move to Substance for texturing, the Adobe ecosystem has evolved. Substance 3D Modeler has emerged as a revolutionary tool that bridges the gap between organic sculpting and hard-surface precision. It allows for a hybrid workflow that is incredibly efficient for stylized characters. This comprehensive guide will walk you through the professional, end-to-end process of creating a Noble Gladiator low-poly character using Substance 3D Modeler for the mesh creation and Substance 3D Painter for the final material definition. By adhering to this structured workflow, you will produce a technically optimized, visually captivating character ready for deployment in modern game engines like Unity or Unreal Engine.
Phase 1: Conceptualization and Design Philosophy
Before manipulating a single vertex or voxel, a professional workflow demands a clear visual target. The term "Noble Gladiator" encompasses a broad spectrum of designs, from Roman-inspired patricians to fantasy high-elf champions. To streamline the modeling process, we must define the specific visual language of our character. For this tutorial, we will focus on a "Imperial Champion" archetype: a character that balances heavy, protective plate armor with ornate, ceremonial aesthetics.
Defining the Visual Pillars
The success of a low-poly model hinges on its silhouette and readability. In the absence of high-frequency details, the overall shape must communicate the character’s identity instantly. Key design pillars for this archetype include:
The Triangular Silhouette: Nobility and strength are often conveyed through an inverted triangle shape—broad shoulders tapering down to a narrower waist. This suggests power and stability. Avoid slouching or hunched postures; the noble gladiator stands tall, chest out, head held high.
Symmetry and Order: Unlike rogue or barbarian characters, which benefit from asymmetry and chaos, a noble character relies on balance. Symmetrical armor plates, a centered crest, and balanced proportions convey discipline and order.
Clean vs. Ornate: The armor should look well-maintained. Avoid excessive dents, rust, or mud. Instead, focus on smooth, polished surfaces broken up by deliberate, geometric ornamentation.
Color Hierarchy: Plan your color palette early. A noble palette typically involves a dominant metallic tone (gold, bronze, or polished steel), a secondary rich fabric color (royal purple, deep crimson, or navy blue), and accent colors for gems or enamel (emerald green, sapphire blue).
Reference Gathering
Create a mood board using tools like PureRef or within Substance 3D Modeler’s reference image importer. Look for:
Roman Lorica Segmentata: For inspiration on segmented plate armor.
Ceremonial Helmets: Specifically those with crests, plumes, or animal motifs (lions, eagles).
Heraldry: Simple, bold symbols that can be translated into low-poly textures.
Statuary: Classical Greek and Roman statues offer excellent examples of idealized human proportions and draped fabric.
Phase 2: Mastering the Substance 3D Modeler Interface
Substance 3D Modeler is unique because it allows you to switch seamlessly between Voxel (organic, freeform) and Polygon (precise, hard-surface) modes. This hybrid approach is the key to efficiency. We will use Voxels for rapid block-out and Polygons for final refinement.
Workspace Configuration
Create a New Project: Select the "Character" template if available, or start with a blank canvas.
Set Resolution: For the initial voxel stage, set the grid resolution to 128x128x128. This provides enough fidelity for blocking out proportions without taxing your system’s memory. You can increase this later if needed, but for low poly, less is often more.
Enable Symmetry: Activate X-axis symmetry. This is crucial for the initial block-out of the body and armor, ensuring perfect bilateral balance. You can disable it later to add asymmetric details like scars or weapon holdings.
Viewport Settings: Enable "Wireframe" overlay occasionally to check the density of your voxels. Set the shading to "MatCap" or "Standard" to get a clear view of the forms.
Essential Tools for Hard-Surface Character Art
While Substance 3D Modeler offers a vast array of organic sculpting brushes, a noble gladiator workflow relies on a specific subset:
Build Brush: The primary tool for adding volume. In Voxel mode, it acts like digital clay. In Polygon mode, it extrudes faces.
Carve Brush: Used to subtract volume. Essential for creating joint recesses, defining muscle separation, and carving out eye sockets.
Flatten Brush: The most critical tool for low-poly stylization. It forces curved or irregular surfaces into crisp, planar faces, creating the faceted look characteristic of the style.
Primitive Stamps: Use cylinder, cube, and sphere stamps to rapidly construct mechanical or armored components like pauldrons, greaves, and helmet crests.
Smooth Brush: Use this sparingly. In a low-poly workflow, over-smoothing destroys the stylized facets. Use it only to blend harsh transitions in the initial block-out phase.
Phase 3: The Voxel Block-Out – Establishing the Form
We begin in Voxel Mode to rapidly establish the mass, proportion, and silhouette of the character. This stage is non-destructive and fast, allowing for easy iteration.
Step 1: The Base Anatomy
Start with a simple humanoid base. You can use the built-in primitive human or build one from scratch using spheres and cylinders.
Torso: Create a broad, inverted triangle shape for the upper body. Emphasize the pectorals and latissimus dorsi to create a powerful V-taper.
Legs: Make them sturdy and straight. Unlike a rogue or assassin, a gladiator needs a solid base. Ensure the thighs are thick to support the heavy armor.
Head: Place a simple sphere or cube for the head. Keep it proportional—not too small, not too large. A slightly larger head can help with facial readability in low poly.
Step 2: Blocking the Armor Plates
Instead of modeling the naked body and then adding armor, model the armor as the body. This saves time and ensures the proportions are correct for the equipped state.
Chest Plate (Cuirass): Use the Build Brush to add a thick, curved layer over the chest. Shape it to follow the pectoral muscles but keep it rigid. Indent the waist area to show the separation between the chest plate and the abdominal guard.
Pauldrons (Shoulders): Add large, rounded volumes on the shoulders. For a noble look, make them slightly oversized and layered. Use primitive stamps to create a base shape, then refine with the Build brush.
Greaves and Vambraces: Add cylindrical volumes to the shins and forearms. These should be thick and protective, tapering slightly towards the wrists and ankles.
Step 3: The Helmet and Crest
The helmet is the crown of the gladiator.
Base Helmet: Build a blocky shape around the head. Leave an opening for the face.
Crest: Use the Extrude tool or a long cylinder primitive to create a prominent crest running from the forehead to the back of the neck. This crest is a symbol of rank and nobility. Make it tall and distinctive.
Visor: If using a closed helmet, add a flat plane for the visor. If open-faced, define the brow ridge clearly.
Step 4: Posing for Presence
Pose the character in a heroic stance. One hand on the hip, the other holding an imaginary sword. A dynamic pose helps you visualize how the armor plates will overlap and move. Ensure the spine is straight and the chest is lifted.
Phase 4: Transitioning to Polygon Mode – Refining the Mesh
Once the voxel silhouette is approved, it is time to transition to Polygon Mode. This is where we convert the organic voxel mass into a clean, optimized, low-poly mesh suitable for real-time rendering.
Step 1: Auto-Retopology with Guidance
Substance 3D Modeler features a powerful Auto-Retopo tool.
Select your voxel object.
Choose Auto-Retopo from the toolbar.
Set the target polygon count to roughly 3,000–5,000 triangles for the entire character. This is a sweet spot for mobile and indie PC games.
Crucial Step: Use Guides. Before running the auto-retopo, draw edge loops manually using the Pen Tool over key areas: around the eyes, mouth, armor edges, and joints. The auto-algorithm will respect these guides, ensuring the resulting mesh has clean topology where it matters most for deformation and shading.
Step 2: Manual Cleanup and Faceting
Auto-retopology is rarely perfect for stylized art. Switch to Edit Mode to refine the mesh.
Flatten Faces: Select the large surfaces of the armor plates (chest, shoulders, thighs) and use the Flatten Tool. This makes the polygons perfectly planar, enhancing the low-poly aesthetic and ensuring crisp reflections.
Sharpen Edges: Select the edges of the armor plates and use the Bevel or Crease tool. Set the bevel width to zero but increase the depth to create a hard edge. This ensures that the lighting engine calculates sharp shadows along the armor borders, making the metal look thick and manufactured.
Reduce Geometry: Delete any unnecessary polygons on flat surfaces. If a chest plate is one flat surface, it should be one or two polygons, not twenty. Merge coplanar faces wherever possible.
Step 3: Modeling the Weapon and Shield
Model the gladius and shield as separate objects initially.
Gladius: Create a tapered triangle for the blade. Extrude it for thickness. Add a simple crossguard and pommel. Use gold-colored primitives for the hilt accents.
Shield: Create a large, oval or rectangular shield. Add a central boss (rounded bump) and a thick rim. Use the Flatten tool to ensure the face of the shield is perfectly flat for painting heraldry later.
Phase 5: UV Unwrapping in Substance 3D Modeler
Proper UV unwrapping is critical for texturing. Poor UVs lead to stretched textures and wasted resolution. Substance 3D Modeler has built-in UV tools that are sufficient for low-poly assets.
Strategic Seaming
Hide Seams: Place seams under the arms, inside the legs, along the back of the helmet, and on the inner side of the shield.
Armor Plates: Unwrap each major armor piece (chest, pauldrons, greaves) as separate islands if they are disjointed. This maximizes texture resolution for each part.
Face: Ensure the face has its own dedicated UV space with no distortion. This is vital for expressive eyes and mouth details.
Packing and Optimization
Use the Auto-Pack feature to arrange your UV islands efficiently within the 0-1 UV space. Leave enough padding (4-8 pixels for a 1024x1024 texture) between islands to prevent texture bleeding during mipmapping. Check for stretching using the UV checker map and adjust islands as necessary.
Phase 6: Texturing in Substance 3D Painter – The Noble Finish
Now, export your low-poly mesh as an FBX and import it into Substance 3D Painter. This is where the "Noble" aspect truly comes to life through material definition and hand-painted details.
Step 1: Baking Maps
Even though the model is low poly, baking maps adds essential depth.
Normal Map: If you created a high-poly version with detailed engravings, bake it here. If not, we will simulate details via painting.
Ambient Occlusion (AO): Bake AO to add soft shadows in the crevices between armor plates and under the chin. This grounds the character and prevents the "floating" look.
Curvature Map: This is essential for edge wear. It identifies the convex and concave areas of your mesh.
Step 2: Creating the Material Stack
Create a layered material stack to manage different surface types:
Base Layer (Fabric): A deep purple or crimson cloth material. Set Metallic to 0, Roughness to 0.8.
Metal Layer (Gold/Bronze): A bright, warm metal. Set Metallic to 1, Roughness to 0.3. Use a mask to apply this only to the armor plates, helmet, and weapon hilt.
Steel Layer (Blade): A cooler, grey metal. Set Metallic to 1, Roughness to 0.4. Apply to the sword blade and shield rim.
Skin Layer: A warm, fleshy tone. Set Metallic to 0, Roughness to 0.5. Apply to the face and hands.
Step 3: Hand-Painted Details and Heraldry
Since it’s low poly, we need to paint details that aren’t in the geometry.
Engravings: Use a small, hard-edged brush to paint thin gold lines on the steel armor plates. These represent intricate engravings of laurels, eagles, or geometric patterns. Keep the lines consistent and symmetrical.
Heraldry: On the shield and chest plate, paint a bold, simple symbol. A lion, an eagle, or a sunburst works well. Use high-contrast colors (e.g., gold on red) to make it pop.
Gemstones: Paint small, bright circles on the helmet and hilt to represent rubies or emeralds. Add a white highlight dot to each gem to simulate reflection.
Step 4: Controlled Wear and Tear
Even nobles see battle, but their equipment is maintained.
Edge Wear: Use a mask driven by the Curvature map to add subtle scratches and scuffs to the edges of the armor. Keep the wear minimal and clean—no rust or deep dents. Just enough to show the metal is real.
Fabric Folds: Paint shadows and highlights on the fabric areas (under the armor, at the waist) to simulate folds. Use a soft brush with a darker shade of the base color for shadows and a lighter shade for highlights.
Step 5: Emissive Accents (Optional)
If you want to add a magical or divine element, use the Emissive channel. Paint a soft glow on the gemstones or runes on the sword. This adds a focal point and enhances the "heroic" feel.
Phase 7: Final Review, Optimization, and Export
Check for Errors
Normals: Ensure all normals are facing outward. Flipped normals will look black or invisible in-game.
Seams: Check if any UV seams are visible on prominent areas. If so, adjust the texture painting to hide them with pattern breaks or dirt.
Texture Resolution: Ensure your textures are power-of-two (1024x1024 or 2048x2048) for optimal engine performance.
Export Settings
Mesh: Export as FBX. Include Normals, UVs, and Tangents.
Textures: Export Albedo (Base Color), Normal, Roughness, Metallic, and Emissive maps as PNG or TGA.
Naming Convention: Use clear names (e.g., Gladiator_Noble_Albedo.png, Gladiator_Noble_Normal.png) to ease integration into game engines.
Professional Tips for Efficiency and Quality
Less is More: In low poly, a single well-placed highlight is more effective than ten poorly placed ones. Trust the lighting engine to do some of the work. Avoid cluttering the texture with noise.
Color Theory: Use complementary colors. Gold armor looks stunning against a deep purple cape. This contrast makes the character visually striking even with simple geometry. Limit your palette to 3-4 main colors to maintain cohesion.
Symmetry Breaking: While the base is symmetrical, break it slightly in the details. A scratch on one shoulder, a slightly tilted crest, or an uneven hem on the cape adds realism and personality without compromising the noble aesthetic.
Modular Design: Model the helmet, sword, and shield as separate objects or distinct UV islands. This allows you to swap them out later to create different variants of the gladiator (e.g., a spearman variant, a swordsman variant) without remodeling the entire character.
Performance Monitoring: Regularly check your triangle count. If you exceed your budget, identify the least visible parts of the model (like the back of the knees or the soles of the feet) and reduce their geometry first.
Conclusion: Forging the Ideal Champion
Modeling a Noble Gladiator in the Substance ecosystem is a profound exercise in balancing mechanical precision with artistic stylization. It requires the discipline to restrict your polygon count while possessing the creative vision to convey strength, honor, and nobility through sharp angles, strategic faceting, and deliberate, hand-painted details.
By following this structured, professional workflow—from initial voxel block-out in Substance 3D Modeler to the final illuminated render in Substance 3D Painter—you equip yourself with a repeatable, industry-standard pipeline. Remember that the essence of a compelling low-poly character lies not in the sheer volume of details, but in the intentionality of every single vertex, edge, and color choice. Your gladiator should not merely appear as a collection of geometric shapes; it must exude a palpable sense of purpose, pride, and power.
With Substance 3D Modeler as your canvas and Substance 3D Painter as your finishing ground, you are fully prepared to bring your unique, heroic creations to life in stunning, optimized detail. Embrace the constraints of the low-poly aesthetic, trust the hybrid workflow, and forge your next digital champion with confidence, precision, and artistic integrity. The arena awaits, and your noble gladiator is ready to claim victory.